Can You Help Us With Photographs Of This Trek?
We are looking to enrich this documentation with more photos. Pictures go a long way in explaining the trail, more than words ever can. If you have done this trek, can you share your photos with us? We will include them on this page, with due credit to you.Click here to contribute.
A Charming Tea House Trail In River Valley Of Ladakh
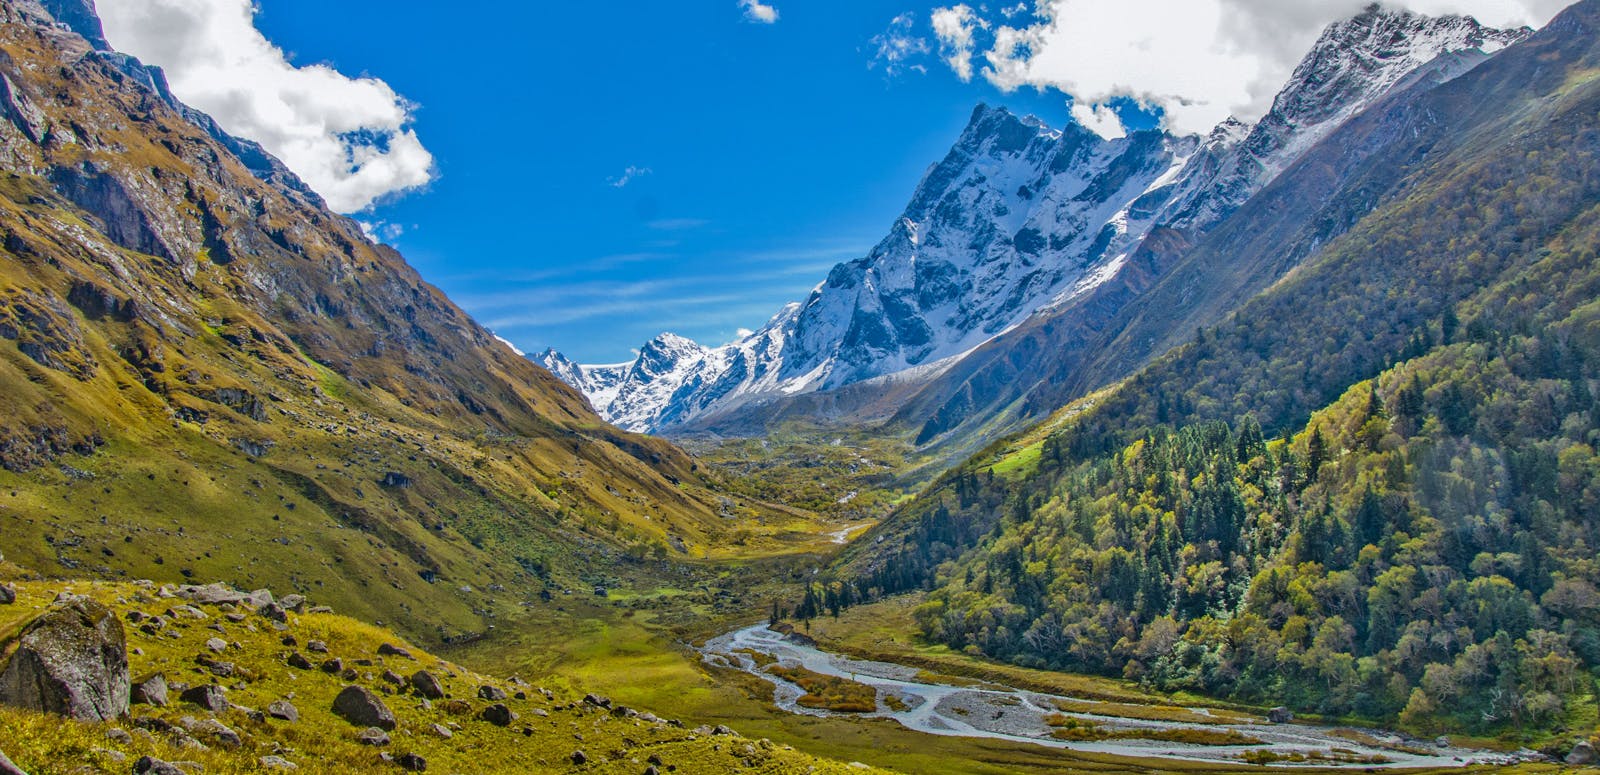
Set in the arid cold desert of Ladakh, Markha is a stunning river valley in Hemis National Park. The trek through Markha Valley is very picturesque and full of adventure.
The trek involves many river crossings, some waist-deep, along with taking you to a hight of 17,060ft while crossing the high pass of Kongmaru La. The trail offers some outstanding views of Mt Kang Yatse (21,300 ft). There are also incredible rocky canyons along the trail, as well as plenty of wildlife.
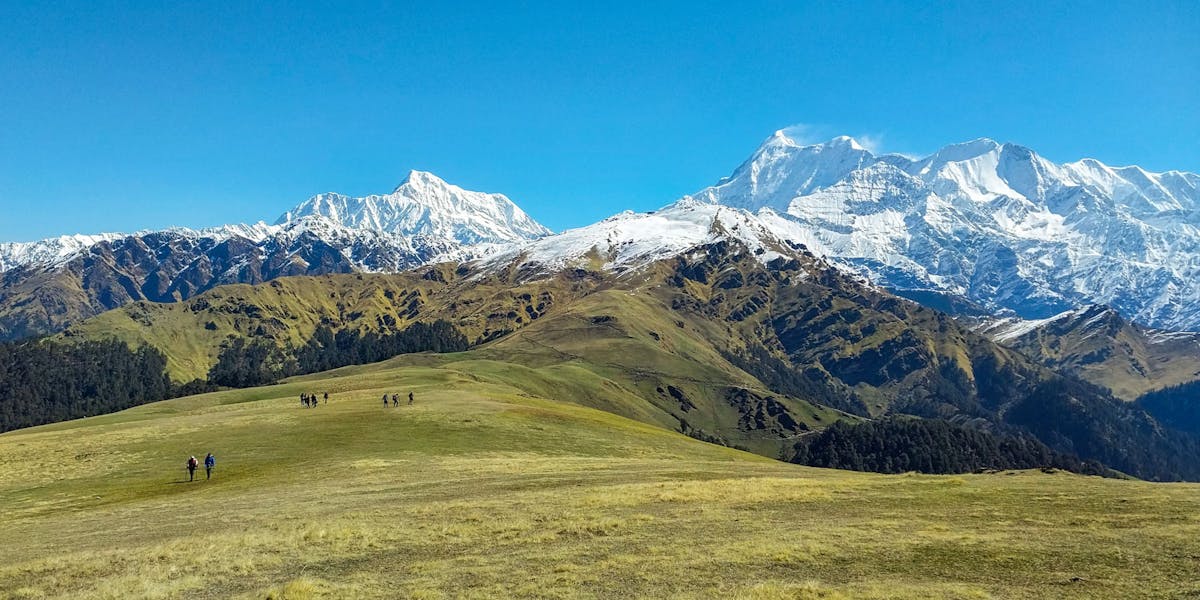
Grand views of Kang Yatse from Markha Valley. Photo by Manoj MN
The most charming bit of this trek however is the lovely villages of Markha Valley. The humble mud houses set amidst lush green fields are a spectacular sight in the middle of the barren mountains of Ladakh. Tibetan culture thrives in these villages, with traditional ornamented kitchens and Buddhist prayer flags, among other things Tibetan.
The best part of it is that you can stay in such lovely homes throughout the trek. There are village homestays all throughout the trail which make Markha Valley one of the few tea-house treks in India. This makes the trek a very rewarding experience, without the logistics involved in camping.
If you are in Ladakh for a short while and can do only one trek, this would be the ideal choice.
What to Watch out for
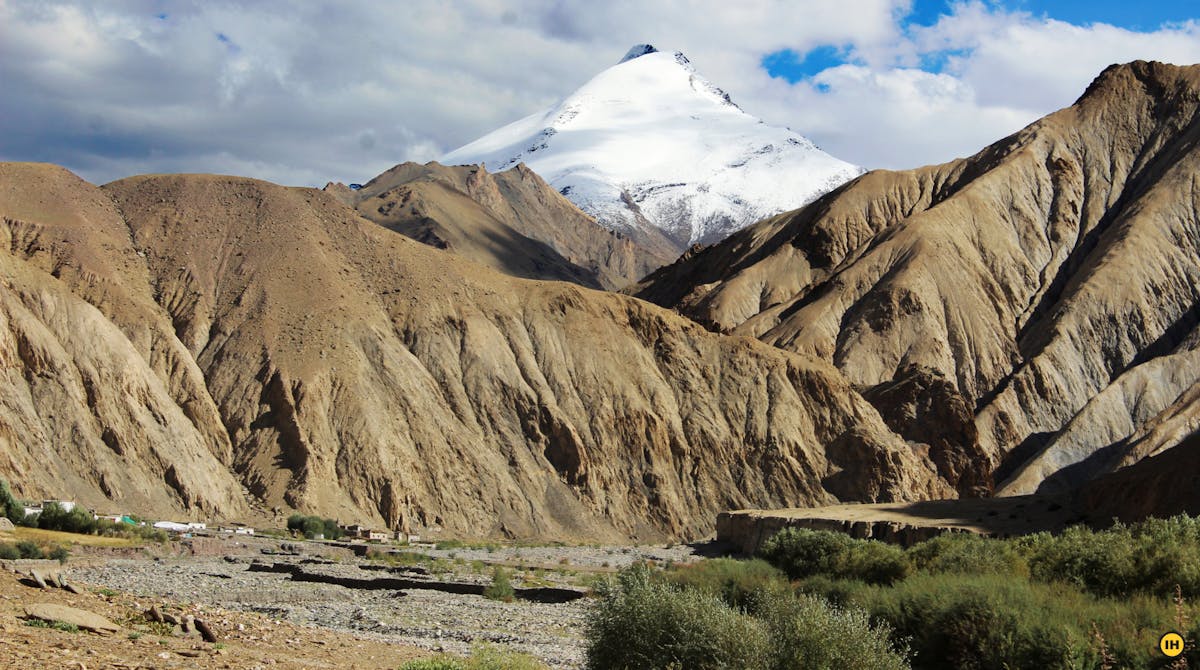
First view of Kang Yatse on Day 3
You get your first view of Kang Yatse on Day 3, as you start trekking towards upper Markha valley. As you climb up from Umlung, you see the near perfect pyramid peak of Kang Yatse towering over everything else. It is a magical sight. The mountain is a silent companion on your trek until you cross Kongmaru La pass.

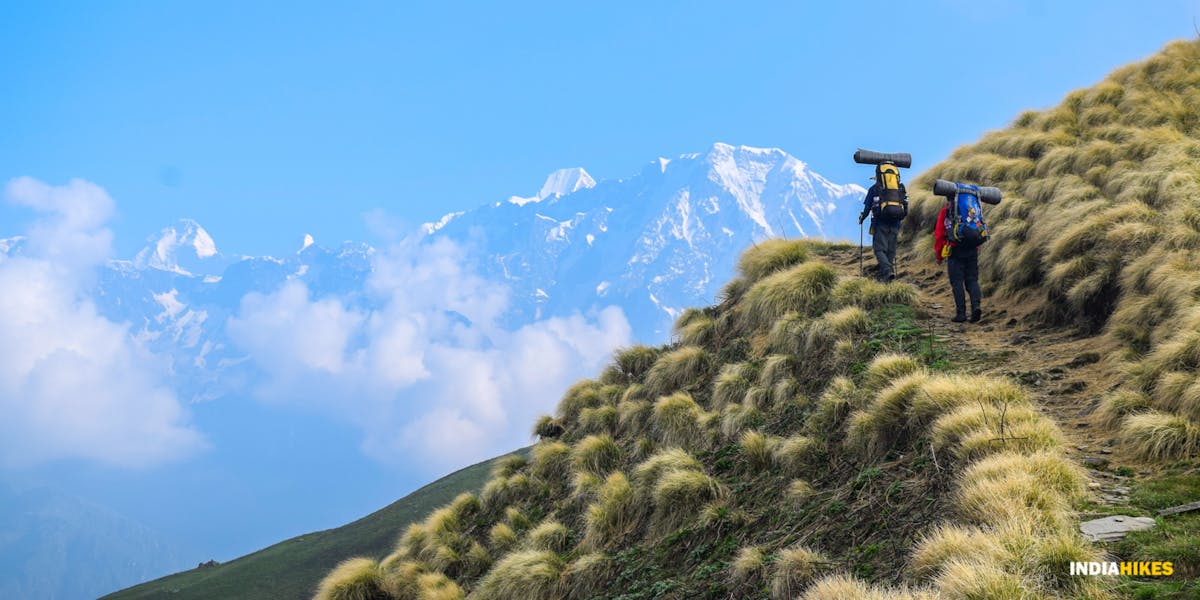
The first view of Kang Yatse from the trail. Photo by Manoj MN
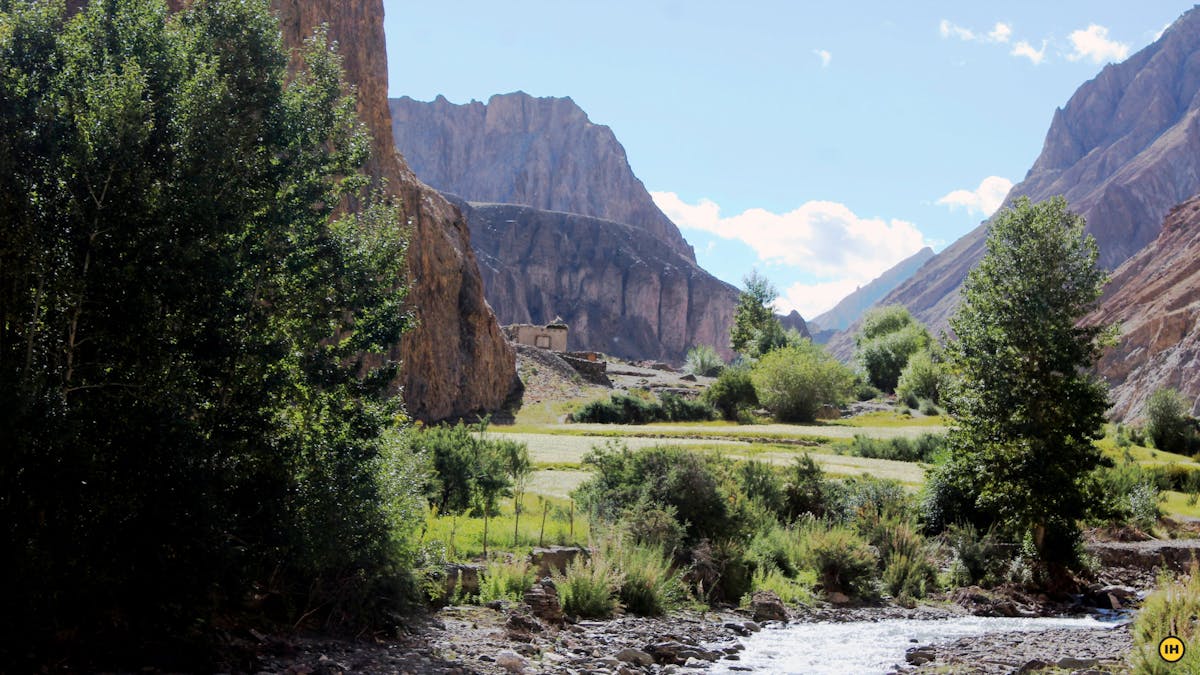
The villages of Markha and Hankar
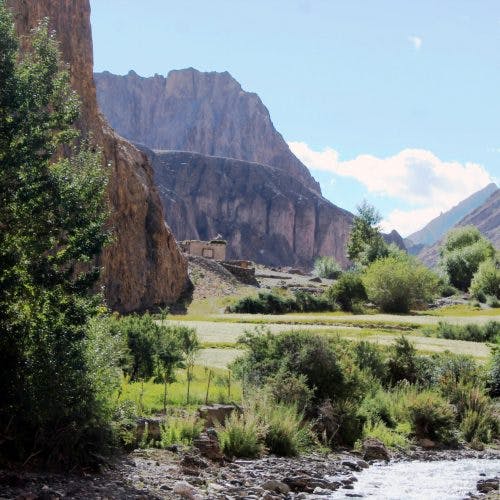
The villages of Markha and Hankar are a rare sight - lush greenery in the middle of a barren, high-altitude desert. The contrast between the dry desert mountains guarding a precious oasis of green civilization is striking. While Markha is one of the biggest villages you would find on the trek, Hankar is more of raw, isolated beauty.
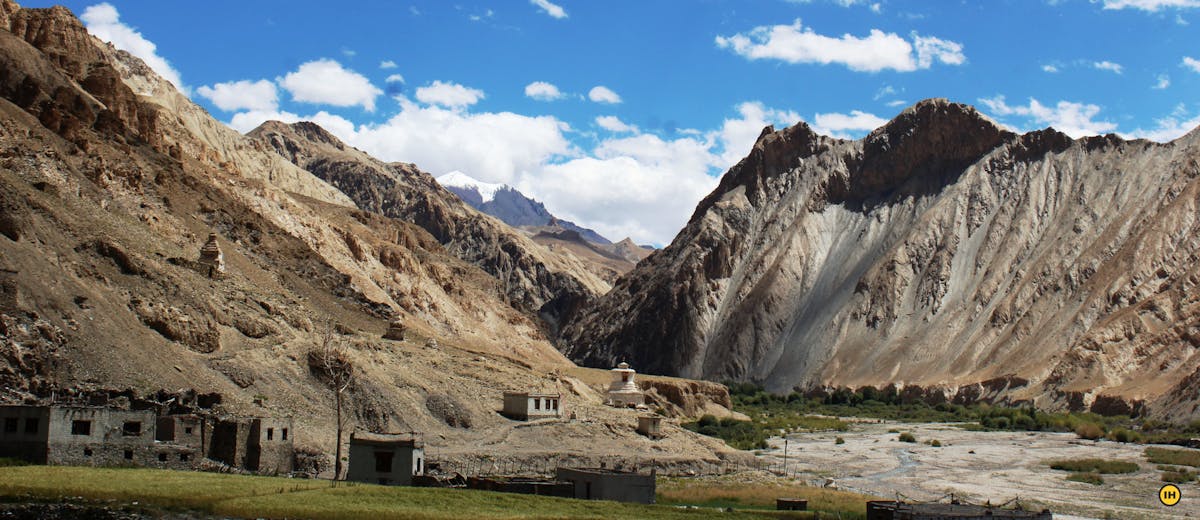
The Markha village is one of the largest villages in the valley. Photo by Manoj MN
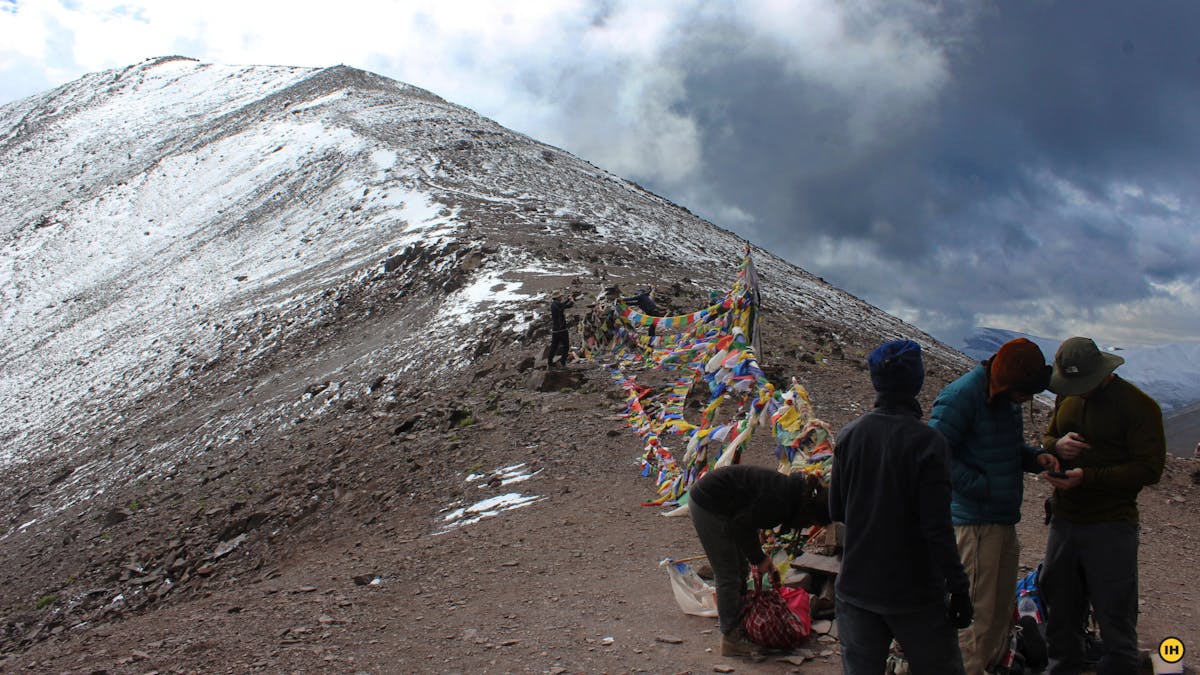
The view from Kongmaru La
The view from the top of Kongmaru La pass is a reward for the grueling climb up to it. On a clear day, you get the first view of the Indus valley and Ladakh ranges from here. And then you turn around to see Kang Yatse is still there, watching over you. It is a magnificent sight!
The view from Kongmaru La. Photo by Manoj MN
Highlights
- Markha Valley trek is also known for being a ‘tea house trek’ where one can expect accommodation in parachute tents at most of the village en route.
- Apart from the striking contrast of trekking in an arid cold desert valley, you get an outstanding view of the Ladakh and Zanskar ranges, the 21,000 ft Kang Yatse and the 20,086 ft Stok Kangri peaks.
- The trek goes inside a beautiful Hemis National Park.
- Some exciting waist-deep river crossing sections on the Markha River to trails going across interesting Buddhist villages and rocky canyons are some of the features that give this trek a unique fervor.
- With close proximity to Leh, which is one flight away from most Indian metropolitan cities, the Markha Valley Trek can be something any traveler to Leh could definitely consider doing.
Trail Information
There are 3 different starting points for this trek- Stok, Spituk and Chilling. Spituk is the most popular starting point. From the Spituk side however you gain altitude very rapidly to Ganda La (over 5,000 ft in two days) before descending sharply to Skiu. Starting from Chilling offers a much easier approach, as you join the trail at Skiu and gradually gain altitude.
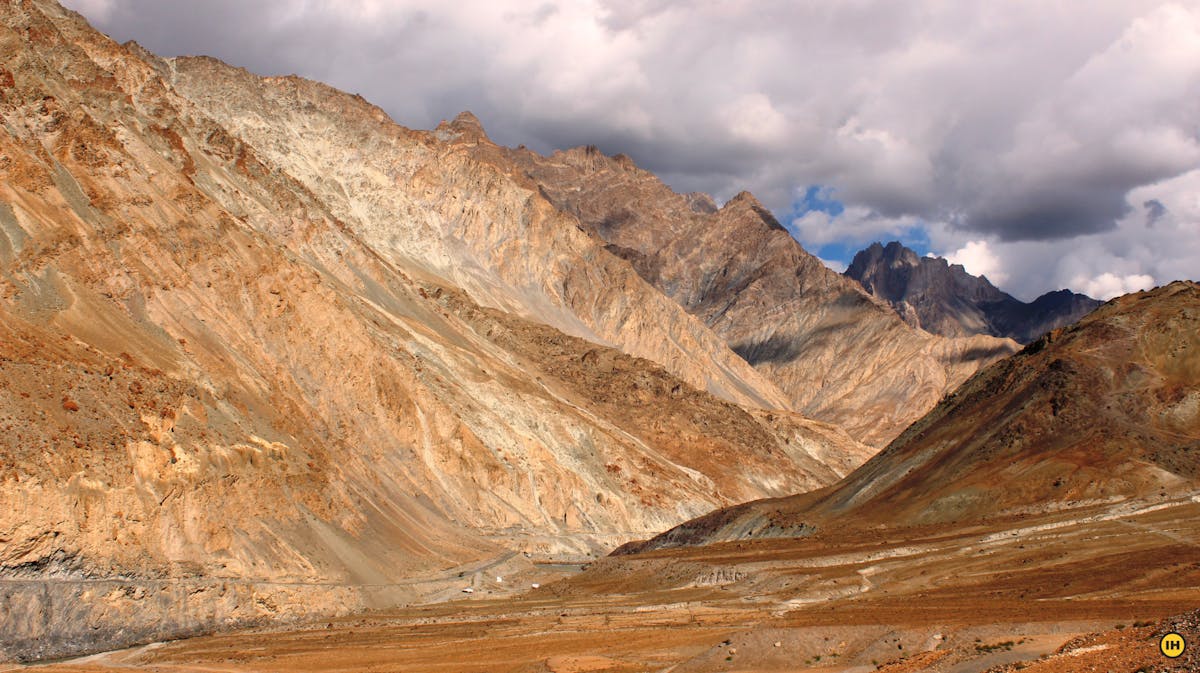
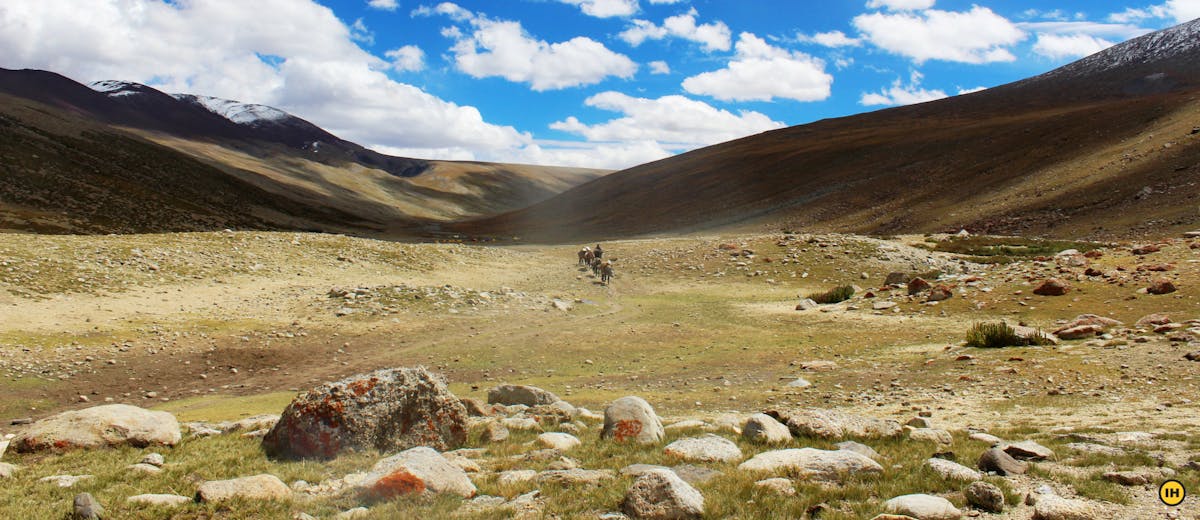
The stunning landscape of Ladakh. Photo by Manoj MN
This itinerary is for starting the trek from Chilling. If you are physically in good shape and well acclimatized, you can choose to start from Spituk or Stok as well. While the best views on this trail are arguably from Markha up to Kongmaru La, starting from Spituk gives you the opportunity to cross two high passes.
Day 1: Leh – Chilling– Skiu
Altitude: 11,560 ft – 10,490 ft – 11,160 ft
Distance: 60 km drive, 7 km trek
Duration: 2 hours drive, 2-3 hours trek
Chilling is the point where Markha river drains into the mighty Zanskar river. It is also the nearest road head for starting the trek.
If you are in a group hiring a taxi would be your best bet (Rs. 3000) since buses from Leh to Chilling run only twice a week. You can also try to get a seat on one of the vehicles heading to Chilling. Many tempo travellers take tourists to Chilling for Rafting tours, if you are lucky you should be able to buy a seat or two by getting in touch with a travel agent.
Once at Chilling, begin by crossing the Zanskar river using the trolley bridge. Crossing the mighty river sitting on the trolley is a fun way to kick things off. Recently a bridge has been constructed here so that is another option for crossing the river.
Looking back at Chilling from the climb. Photo by Manoj MN
After crossing the river, take a right turn. This is actually a motorable road that continues for a few kilometers. Just as you start you will notice a path that deviates from the road and climbs up. Feel free to take this path to skip the rather monotonous walk along the road.
The initial part of the trail involves a steep climb for about half an hour and you might struggle a bit because of the altitude. But the tough part of today’s trek is over. The trail joins the road from here and flattens out.
From here it is a relatively flat walk above the Markha river all the way to Skiu. En route, you will pass the village of Kaya after another 3 km. There are homestays in this village as well so you can rest here for the night, though it will make the next day very long.
Skiu is another 3 km ahead of Kaya. It is a nice village nestled between huge rocky mountains. There are homestays here, as well as camping grounds. It is not advisable to go ahead as the next village is quite far away. Get some good rest tonight to prepare for tomorrow’s long walk.
Day 2: Skiu – Markha
Altitude: 11,160 ft – 12,370 ft
Distance: 20 km
Duration: 6-7 hours
Today is a long day of relatively flat trekking along the riverbed. It is also the lone day of the trek where you see some greenery, as you pass by many barley fields and thickets along the Markha river. The challenge (and fun) today will be crossing the icy waters of Markha river, not once but twice.
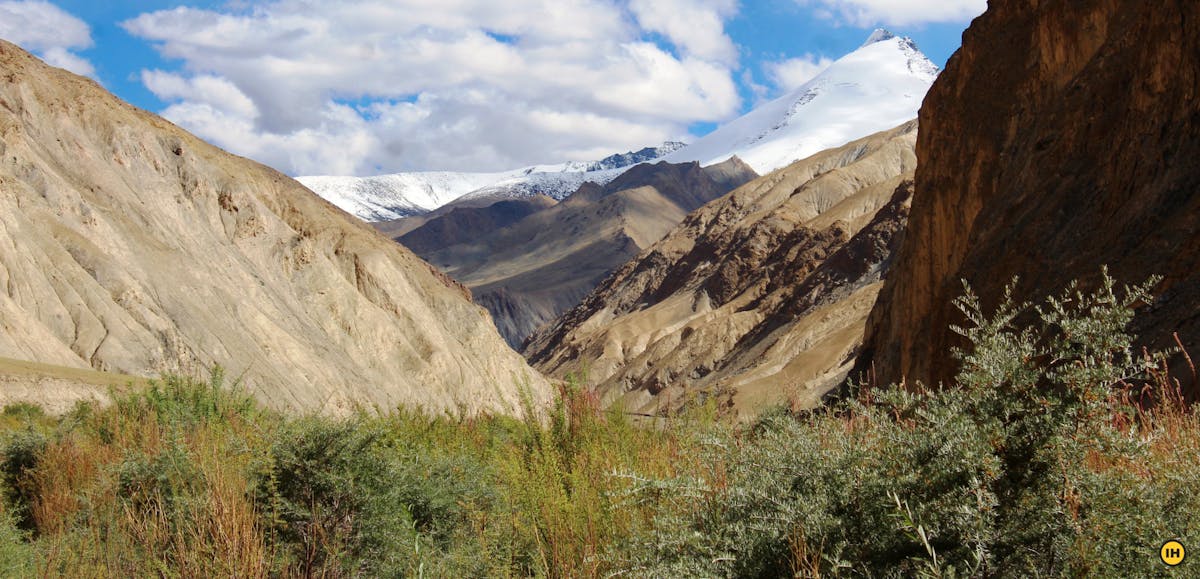
Rocky canyons along the trail. Photo by Manoj MN
Start by heading eastwards up the Markha valley. The trail goes along the river for 2 km till you reach a bridge. Do not cross the bridge but stay on course along the river.
The trail from here has a few washout sections requiring you to climb up and down to pass the broken section of the trail. The trail ahead goes through a bridge crossing. 2 km further from this bridge is a clearing known as Narding. Another 3 km ahead is a campsite called Sara.

This is the lone day of the trek where you see some greenery, as you pass by many barley fields and thickets along the Markha river. Photo by Manoj MN
1 km ahead of Sara is another bridge which you have to cross. You have reached the village of Chalak. It is a beautiful village with Barley fields. It takes 5 to 6 hours to reach Chalak from Skiu. From Chalak, the trail ascends gradually as you pass by a trail marked by Bharal horns.
After 2-3 km, the valley opens up and a river crossing takes you to Markha Village. The water here can be thigh-high. The water is icy cold so it is better to take off your shoes and socks and pull up your pants. Look for a suitable spot for wading in, preferably where the river widens.

The Markha village is one of the largest villages in the valley. Photo by Manoj MN
Once you cross over, trek for a couple of kilometers till you reach the final bridge crossing for the day. As you cross over the bridge, you approach Markha- the biggest village in the valley. Markha has over 25 houses and there are many homestays here.
Day 3: Markha – Hankar
Altitude: 12,370 ft – 13,100 ft
Distance: 11 km
Duration: 4-5 hours
The most beautiful part of the trek begins today. The views start to open up today as you enter upper Markha valley. You get amazing views of Kang Yatse, a near-perfect pyramid, on today’s trek.
Take the trail that climbs up from Markha village. Follow the trail from Markha village alongside Markha River. You will come across a wooden plank bridge, ignore it and continue walking with the river to your right.
After about 2 km, you have to wade through Markha River. You will need to cross over at least twice today. After the second river crossing, it is a 2 hour hike up to Umlung, a small settlement. Look out for the Umlung Gompa and cross over from its base to reach Umlung.
The first view of Kang Yatse from the trail. Photo by Manoj MN
As you climb up from Umlung you get the first view of Mt. Kang Yatse, it is a truly breathtaking sight. Two hours of walking skirting up a gorge will take you to the picturesque village of Hankar. It is possible to go further to Thochungtse, but there are no homestays there.
Day 4: Hankar – Nimaling
Altitude: 13,100 ft – 15,400 ft
Distance: 10 km
Duration: 5-6 hours
Today is another short day of trekking in a spectacular setting. Take it easy and enjoy the views, but make sure to reach Nimaling early before the weather turns bad.
Continue along the trail as it climbs up steeply from Hankar. After about 1 km, the trail splits in two. Ignore the trail that climbs up, it goes to a pass called Zalung Karpo La. Continue along the lower trail, after another 1 km, you will reach the campsite of Thochuntse.
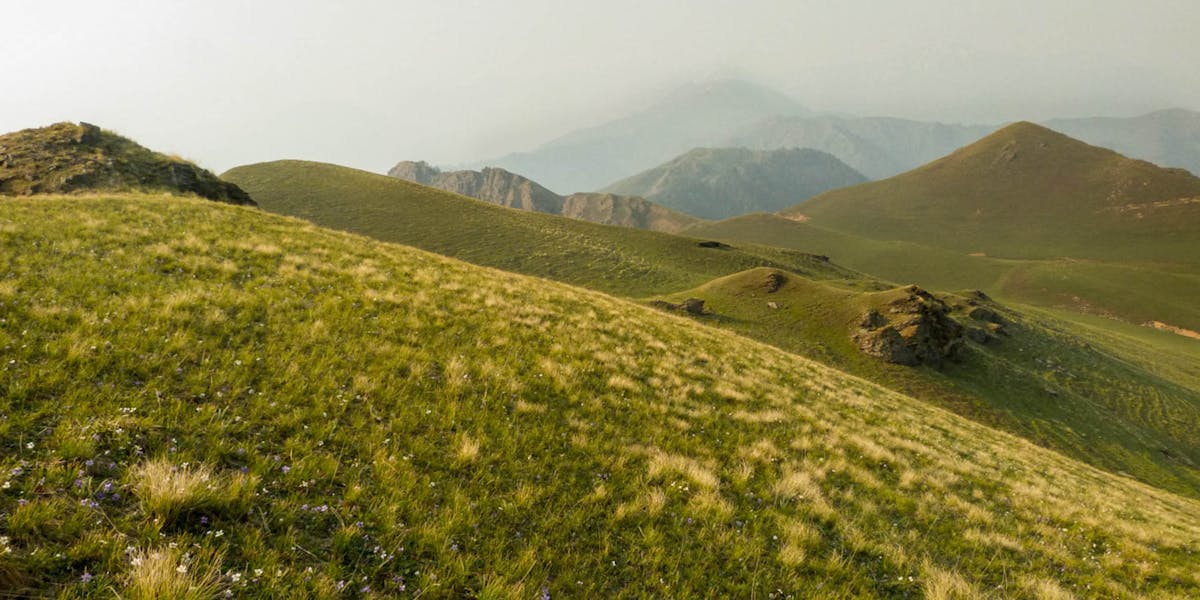
The landscape at Nimaling. Photo by Manoj MN
Thocuntse has lovely green fields with a couple of teahouse tents. Just after Thochungtse there is a fork in the trail. Take the trail to your left, the trail to the right goes towards Kang Yatse base camp.
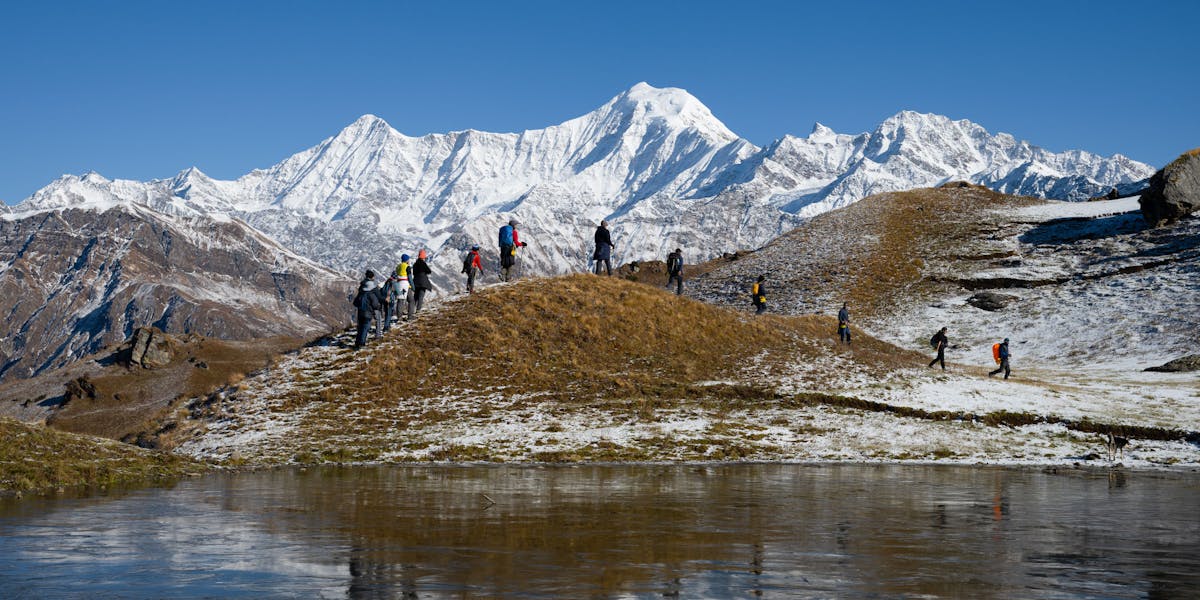
The trail remains quite steep for about an hour before the ascent becomes relatively gradual. Soon you reach a beautiful pond with Kang Yatse in the backdrop. This is a perfect spot for having your packed lunch.
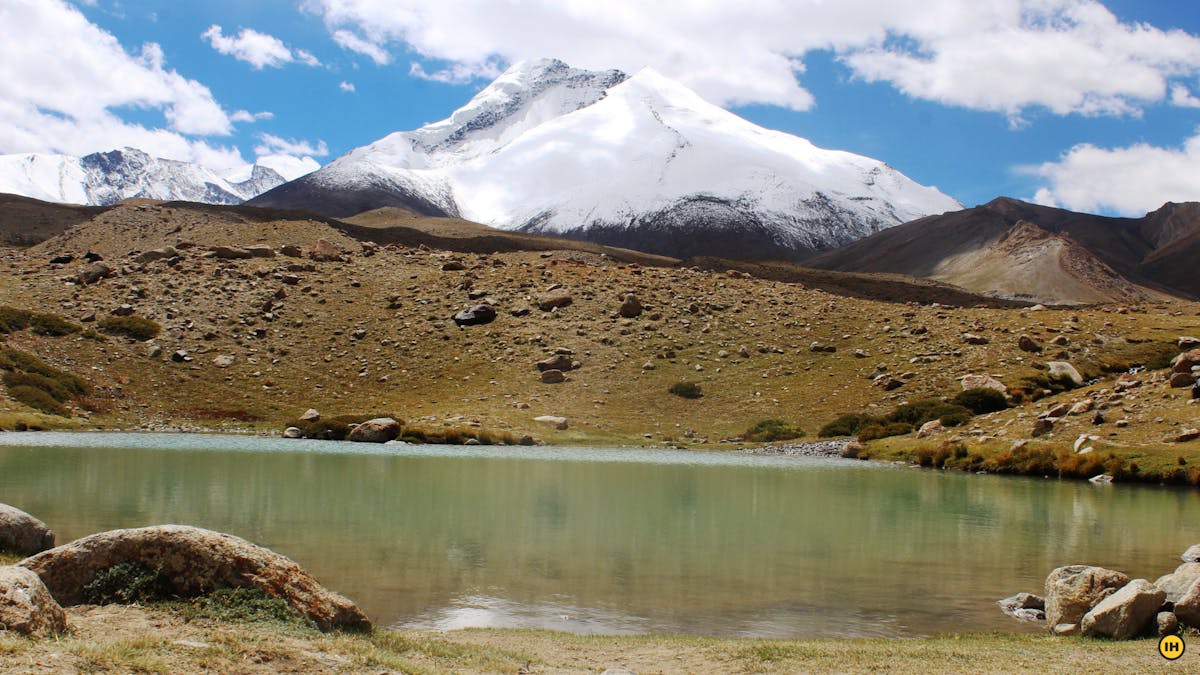
The view of Kang Yatse from Nimaling. Photo by Manoj MN
From the pond, it is a gradual but long descent to the wide, windy plateau of Nimaling. Nimaling is surprisingly green given its altitude and is used as a summer pasture. In the trekking season (May to September), there is a tea house here with many ready-to-use tents where you can sleep for the night.
Day 5: Nimaling – Kongmaru La – Chokdo
Altitude: 15,400 ft – 17,060 ft – 12,810 ft
Distance: 12 km
Duration: 5-6 hours
Today’s trek is relatively difficult. First you have to negotiate the short but steep ascent to the high Kongmaru La. But what is perhaps more difficult is the steep, almost never ending descent from the pass.
Most people descend all the way down to Shang Sumdo the same day, but that makes for a rather unpleasant last day. If time is not a constraint, it is highly recommended to stop at Chokdo for the night.
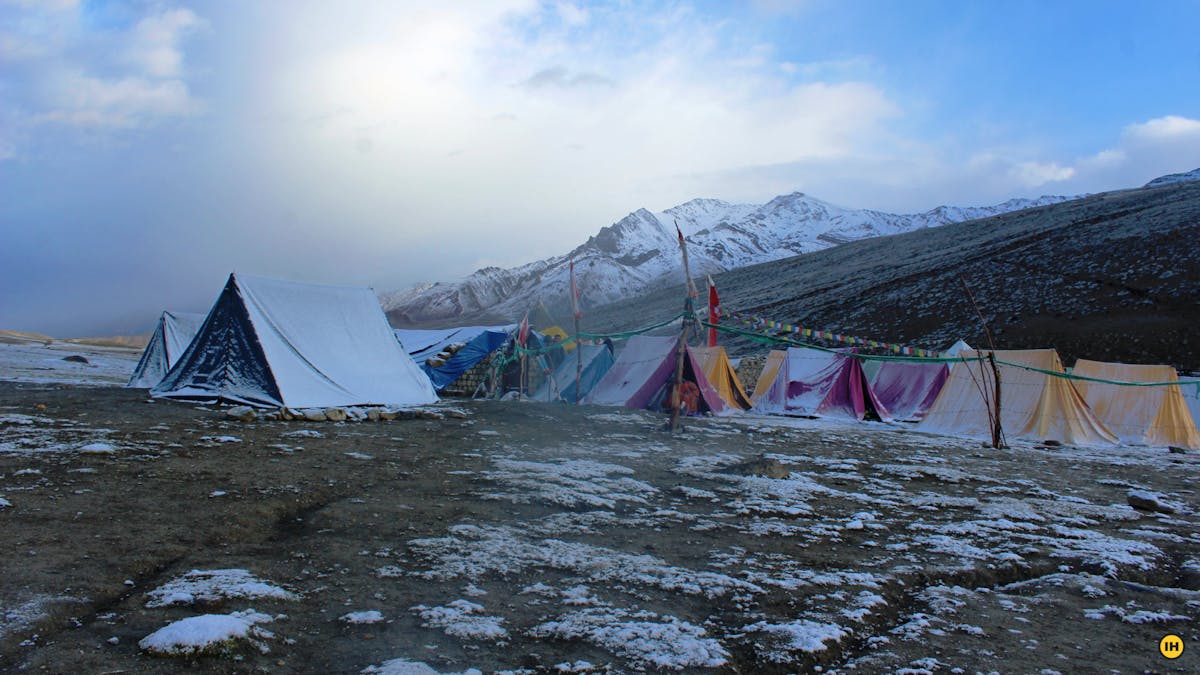
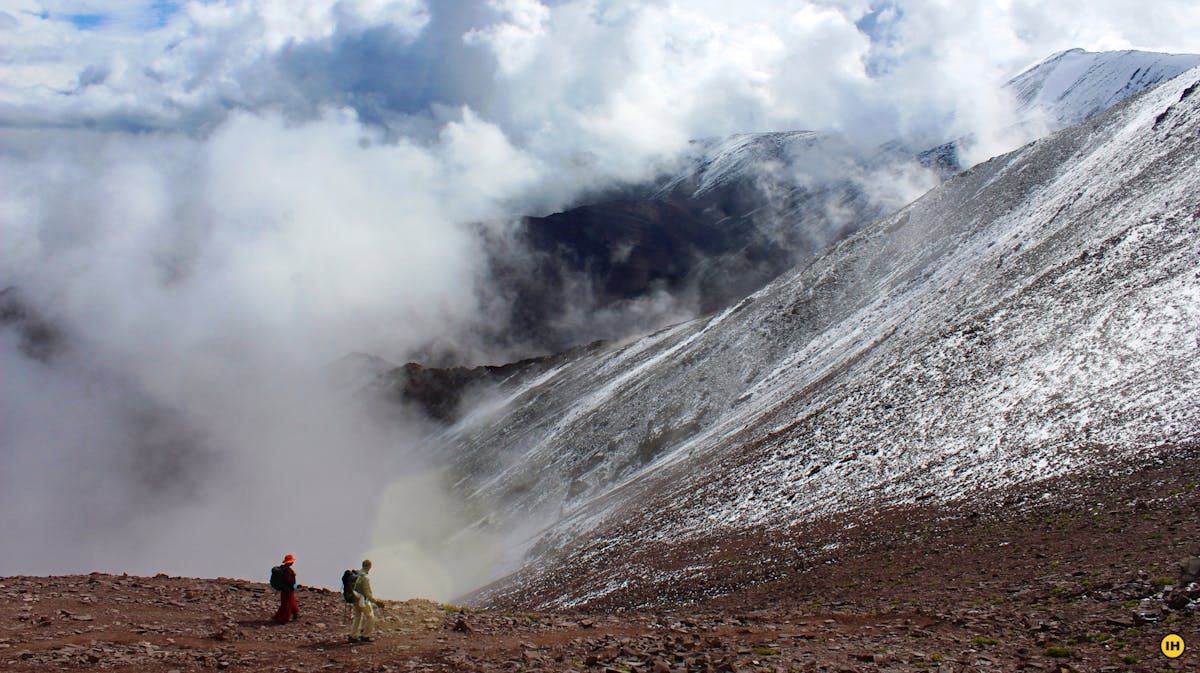
Nimaling campsite after fresh snowfall. Photo by Manoj MN
From Nimaling, Kongmaru La is very clearly visible to the east. Cross the stream near the campsite and proceed towards the pass. There is a clear trail that climbs up steeply to the pass. From Nimaling it takes around 2 hours to reach the pass.
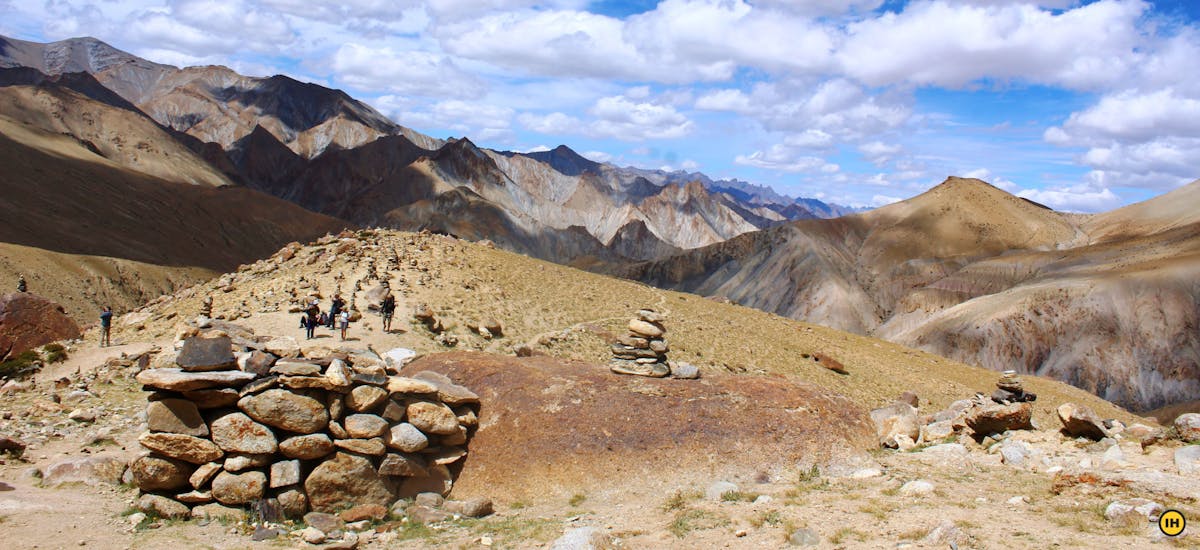
Kongmaru La is a great spot to rest after the grueling trek up. On a clear day, you get great views of the Indus valley and Ladakh ranges from here.
The top of Kongmaru La. The only place on trail you will find mobile network. Photo by Manoj MN
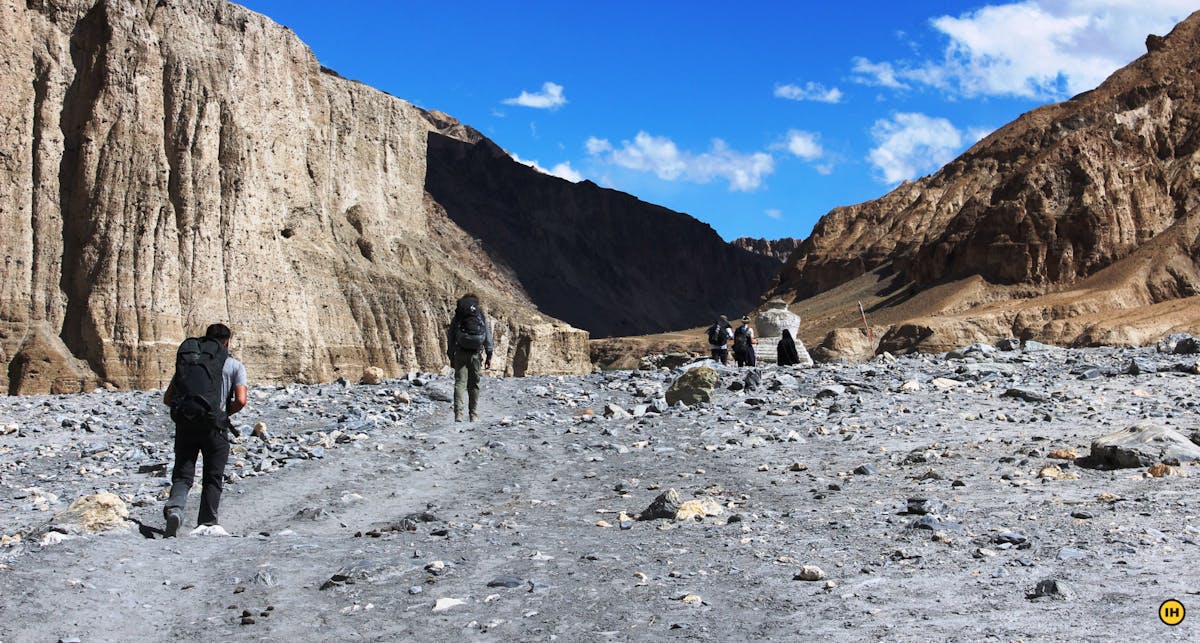
This is however not the end but rather the beginning of the really difficult part of the day. The descent from the pass is brutal. The terrain is rocky and drops down steeply as you enter into a narrow canyon after trekking down 2 to 3 km.
After about 2 hours of descent, the canyon widens as your reach Sukarmo. Sukarmo has tea house tents so you can also stop here for the night if you wish to. After another hour of walking on the river bed, you come to a section running along a small hill. The trail here is descending consistently.

The descent from Kongmaru La. Photo by Manoj MN
Soon you will reach Chokdo, a small village and your destination for the night. You can stay at one of the homestays here. Chokdo has phone facilities so if you plan on taking a taxi from Shang Sumdo to Leh, it is advisable to book one at Chokdo itself. Otherwise you might have to wait long hours for a taxi once you reach Shang Sumdo.
Day 6: Chokdo – Shang Sumdo – Leh
Altitude: 12,810 ft – 12,140 ft – 11,560 ft
Distance: 5 km trek, 50 km drive
Duration: 2 hours trek, 2 hours drive
Today is a very short and easy day of trekking to the road-head Shang Sumdo. It is a flat walk along the river bed and should take you less than two hours.
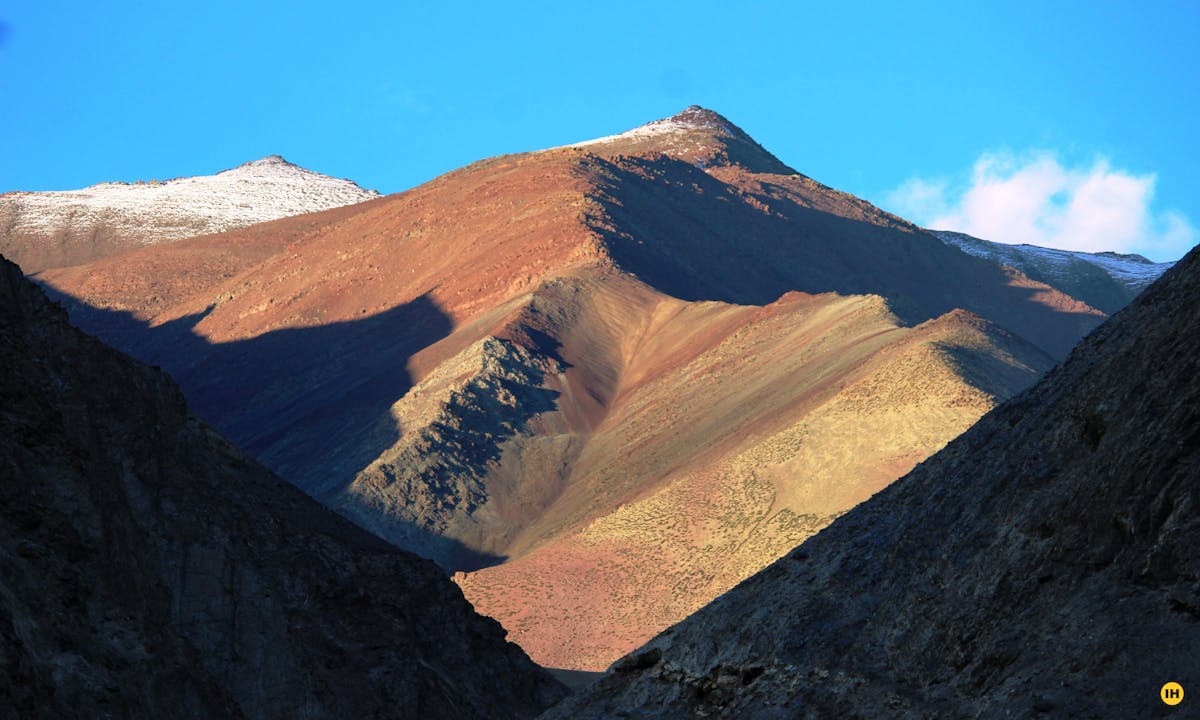
The colourful mountains of Ladakh. Photo by Manoj MN
From Shang Sumdo there are buses to Leh, but they are not frequent. In case you don’t find a bus you can take a taxi to Leh. It is a good idea to find fellow trekkers willing to share the taxi. En route to Leh you can visit Hemis monastery.
How Difficult is the Markha Valley Trek
Most treks in Ladakh are higher up on the difficulty scale because of the altitude and terrain. Leh, your base camp, rests at 11,560 ft! Almost all treks in Ladakh would involve pass crossings above 15,000 ft. It is where the name Ladakh ("land of high passes") comes from, after all.
The difficult sections on this trek are few, as the trail itself is moderate.
The climb to and descent from Kongmaru La
The climb to Kongmaru La is quite difficult - steep but mercifully short. The descent on the other hand, is long. It is steep descent on scree, which is taxing on your legs.
The river crossings
Following along the Markha river. Photo by Manoj MN
How to get fit for the Markha Valley trek

The Markha valley trek is classified as a moderate- difficult trek. You start from an altitude of 10,490 feet at Chilling and reach the highest point of 17,060 feet at Kongmaru La. Therefore, you have to make sure your lungs are strong for this.
Cardiovascular endurance
On the Markha Valley trek, apart from huge altitude gains, the trail is long and tiring. This requires a good amount of endurance.
Cardiovascular endurance – Target 10 km in 70 minutes before the start of the trek
You can begin by jogging every day. Start slow and increase your pace every day. Swimming, cycling and stair climbing without too many breaks in between can help too.
In order to be prepared for a high-altitude trek, you should have a combination of distance and speed targets.
Here’s a fitness routine that works:
In case you’re just starting with a regular fitness routine, phase out your distance targets in the following manner –
- Target completing 5 km in 30 minutes when you begin.
- Gradually increase your pace by running 4 times a week and bring it down to 5 km in less than 30 mins.
- If you are above 45 years and are comfortable with brisk walking, then target covering 10 km in 75 minutes.
If you are somebody who prefers cycling over running, then try to cover 25 km in 60 minutes.
Record your run on an app like Nike Run or Strava. Start recording your run when you start running. At the end of your run, hit the stop button.
Note: Make sure your GPS is on when you record your run.
Strength – Target 4 sets of squats with 20 in each
This is another area you should work on. There is a lot of trekking distance that you will cover at high altitude carrying your backpacks. You have to walk on uneven terrain during the trek. It could be taxing for your legs. For this, strengthening your legs will help. You can do some squats to strengthen them. Start with 3 sets of squats, with 8 squats in each set and work towards reaching your target in 3 weeks.
Flexibility
Another aspect that will help you trek comfortably is flexibility. For this, you can do some stretching exercises – stretch your hamstrings, quadriceps, hip flexors, lower back muscles and shoulders regularly. On your trek, it is important that you arrive on the slopes with your muscles relaxed. Carrying a backpack, however light, can become a strain after a while. These exercises will help you to be in good shape before the trek.
Here is a chart that you can follow to get fit for your trek.
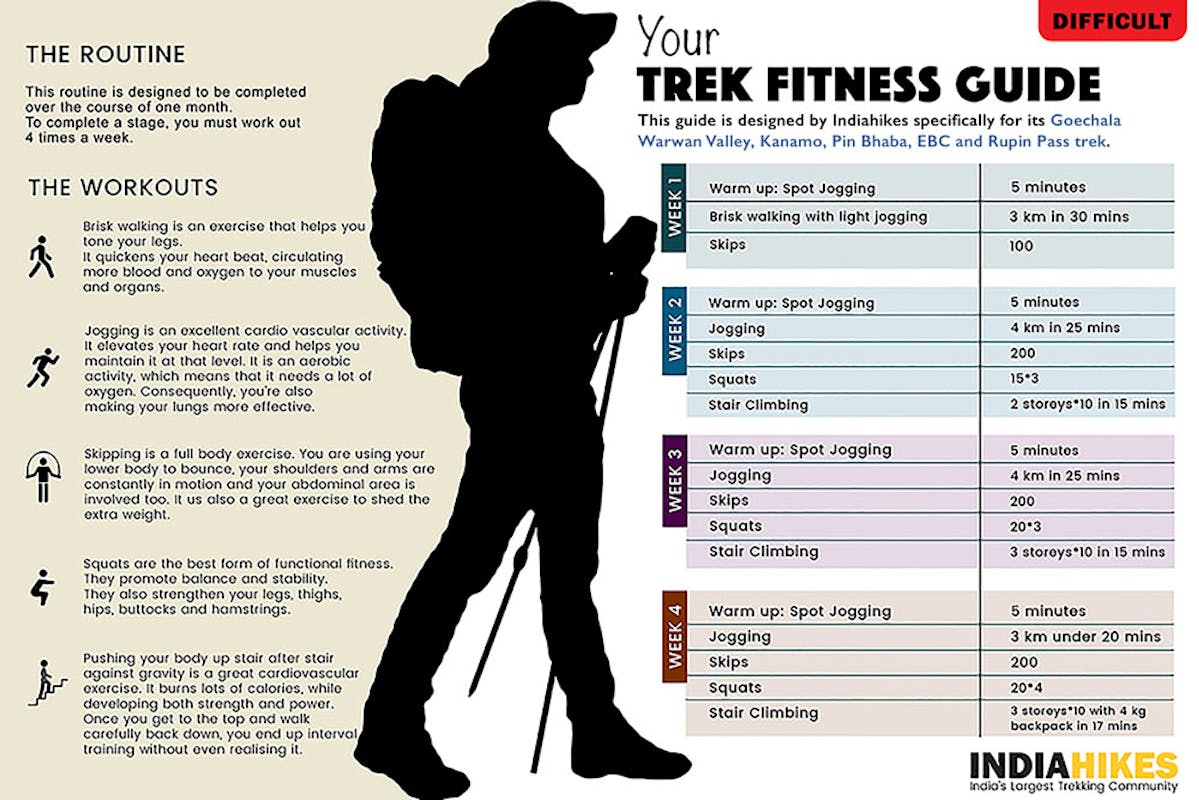
Fitness guide
Working out indoors
If you can’t go out and jog because of time and space constraints, here’s a video you can use to work out indoors.
How to Plan Your Travel
The trek starts at Chilling and ends at Shang Sumdo. Leh is the ideal point to start your journey for the trek.
Reaching Leh
By air: The easiest way to get to Leh is to fly in, Leh is accessible by air from all major Indian airports. If you do fly in, you should rest in Leh for at least a day in order to acclimatize to the altitude (11,560 ft).
By Road: The more adventurous but time-consuming way to get to Leh is by taking the road, either from Manali or from Srinagar. The Manali-Leh route is arguably more scenic than the Srinagar-Leh route, though it is also higher. Buses, as well as shared taxis, run on both Manali- Leh and Srinagar-Leh routes.
Traveling by the HRTC bus is the cheapest way to get to Leh from Manali. It takes two days and costs about Rs. 800, halting at Keylong for the night. Keylong is a nice town in itself and it would be a good idea to stay there for a day. A slightly more expensive but convenient option is the HPTDC run deluxe bus which stops at tourist locations along the way. It costs around Rs. 3000, which includes tented accommodation and food at Keylong.
There are also many privately run shared buses and taxis available, but be sure to get the details of the route. If you do opt for a shared taxi take one that stops overnight, preferably at Jispa. Avoid the taxis that run non-stop from Manali to Leh, it will be sheer torture.
What to Take on Your Trek
Useful videos to help you with your gear
Bare Necessities:
- Trekking shoes: Carry trekking shoes and not sports shoes. You will be walking a long distance, so it is imperative that you have a comfortable and reliable pair of trekking shoes. You will likely encounter very little snow on the trail, so waterproof trekking shoes are not required. You can watch this video to learn to choose the right trekking shoes.
- Backpack (40-60 litres): A backpack with sturdy straps and a supporting frame is a must. This is a teahouse-style trek so you don’t need to carry any camping equipment.
Clothes
- Three layers of warm clothes: Nimaling is very windy and can get very cold in the evenings. You will need at least two warm layers (one light layer such as fleece or woolen and one padded jacket), though three are preferable.
- Three trek pants: Two pairs of pants should suffice for this trek. Wear one pair and carry an extra pair just in case it rains or you need to change at some point on this long trek. Denim/jeans and shorts are not suitable for trekking.
- Three collared t-shirts: Carry light, full-sleeved t-shirts that prevent sunburns on the neck and arms. You could even get by with just two, but do not carry more than four. In any case, you won’t need them.
- Poncho/Rain Jacket: Although not necessary since you are trekking in a desert region, it can still rain occasionally.
- Thermals: Carry thermals (top and bottom) to keep yourself warm at night. Keep your thermals fresh and don't wear them while trekking.
Accessories
- Sunglasses: Sunglasses help prevent snow blindness. There might be snow close to some of the passes and wearing sunglasses would be advisable. Moreover, because of the altitude, the sun is particularly harsh in Ladakh and sunglasses would be required.
- Suncap: The sun is harsh at high altitudes, which is why a sun cap is mandatory.
- Hand gloves (optional): One pair of fleece or woolen hand gloves which is water-resistant..
- Balaclava: You'll need this to cover your head, as most of the heat escapes from your head.
- Socks (2 pairs) and a pair of woolen socks: Carry at least two sports socks for trekking, and another woolen sock for the night.
- Headlamp/LED torch: Mandatory
- Trekking pole: Watch this video to understand why you need a trekking pole.
Others
- Toiletries (Sunscreen, moisturizer, light towel, lip balm, toilet paper, toothbrush, toothpaste). Do not carry wet wipes since these are not biodegradable. If you do happen to use wet wipes to clean up after a trek, make sure you bring them back with you.
- Tiffin Box: You will get a packed lunch at the homestays. Have a tiffin box to carry the packed lunch.
- Two water bottles: 1 litre each
- Plastic covers: While packing, use Ziploc covers to compartmentalize things and carry a few extra plastic bags for wet clothes. You also need Ziploc packets to keep soiled sanitary napkins if you use them on the trek.
Mandatory Personal Medical Kit
- Diamox - 10 tablets (to prevent AMS)
- Crocin – 6 tablets (fever)
- Avomine – 4 tablets (motion sickness)
- Avil 25mg – 4 tablets (allergies)
- Combiflam – 4 tablets (Pain killer)
- Disprin – 6 tablets (headache)
- Norflox TZ & Lomofen– 6 tablets each (diarrhea)
- Digene - 10 tablets (acidity)
- Omez/ Rantadine – 10 tablets (antacids)
- Crepe bandage – 3 to 5 meters
- Gauze - 1 small roll
- Band-aid – 10 strips
- Cotton – 1 small roll
- ORS – 10 packets
- Betadine or any antiseptic cream
- Moov spray (aches, & sprains)
Frequently Asked Questions
1. Can I do this trek on my own?
Certainly. You do not need any technical skills to complete this trek. The trail is also fairly well defined so you do not need a guide. It would however be advisable to get a map, though you can get by without one. There are some tricky portions and side trails, so be sure to check with fellow trekkers and locals.
2. Are there any facilities to stay or eat along the trail?
Plenty. There are villages on the route, and they all have homestays. In the summer months, there are also teahouse tents put up along the trail. This is what makes this a teahouse-style trek. As of 2019, it costs Rs. 1000 at homestays and Rs. 1200 at Nimaling, including food, tea, etc. Keep in mind that the prices have been increasing regularly.
The food is generally very nice at the homestays. For dinner, you will likely get local Ladakhi dishes like skyu. Breakfast is generally Tibetan bread with apricot jam and butter. Homestays also give you a packed lunch which generally includes a boiled egg, chocolate, and maybe some more Tibetan bread.
3. Are there water sources along the trail?
There are not many water sources along the trail. There are a few streams, but the water from the Markha River itself is not drinkable. It is highly recommended to fill your water bottles at teahouse tents and homestays en route. They have boiled and filtered water and charge a nominal fee for it.
4. What permits will I need to do the trek?
No, you do not need any permits. However, if you start from Spituk, you will need to pay forest entry fees.
Emergency contacts
Hospital: The closest one is Sonam Nurboo Memorial Hospital in Leh. They are well-equipped to deal with high-altitude sickness.
Police station: The police station closest to Hemis National Park, where your trek is, is in Leh. The police station is on Sankar Road.
ERSS: For any kind of emergency help, you can contact the Pan-India Emergency Response Support System (ERSS) number- 112. However, bear in mind that there's poor to no network coverage on the trail apart from on top of Kongmaru La.
ATM: Leh is the last point where you can withdraw cash for this trek.
Mobile Network: There is no signal on the trail except on top of Kongmaru La pass. Leh and its surrounding are the places where you can get an uninterrupted network. Only postpaid SIMs work in the Ladakh region.
Looking for places to visit after your Markha Valley trek?
The Markha Valley trek ends in Shang Sumdo. Once you are back in Leh from Shang Sumdo, there are plenty of things you can do.
There are many monasteries that are worth a visit in Ladakh. However, the over 400-year-old Hemis gompa may be the best of them all. It is the grandest monastery you will see. Other monasteries you should see are Spituk monastery (unusual for it's worship of Tara goddess), Thiksey (which is modeled like the Potala palace of Tibet), and Matho. If you don't mind going further from Leh, consider going to Lamayuru and Alchi as well. They have few of the oldest monasteries in Ladakh.
Leh Palace and Tsemo Monastery
The Leh Palace and Tsemo monastery are the most recognizable landmarks above Leh city. There is a nice path to the palace from Leh's main bazaar to the palace that you can take. The Leh palace was built in the 17th century by Senge Namgyal. Senge shifted Ladakh's capital from a village called Basgo (recognizable as backdrop in the Bollywood movie Dil Se) to Leh with the building of this palace. From the palace, you can take the path further uphill to the Tsemo monastery. The view from Tsemo is spectacular - the entire Stok range is in front of you!
Magnetic Hill and Pathar Sahib
They say that the first Sikh guru Guru Nanak had left a palm imprint on a rock. This is now preserved in Patthar Sahib gurudwara. The Gurudwara falls on the Leh-Kargil road. Further along the Leh-Kargil road, is Magnetic Hill. The Magnetic Hill is an optical illusion - the layout of the surrounding is such that makes a slight downhill slope look like an uphill slope. So, if a car is left to it's devices, it will appear to roll uphill.
The Shanti Stupa is an only recent part of Ladakh's history. It was made by a Japanese peace sect and is filled with murals depicting Buddha's life. Not only is this a great monument to visit, the view from Shanti Stupa of the entire Leh town and Stok range is incredible. Truly a moment for the photos.
Tip: Jot down the above-mentioned contacts on an easy-to-access card. This can come in handy during emergencies.
Trek Documented by Alok Tiwari, Danny Sleeve, Manoj MN & Sandhya UC.
Author: Alok Tiwari & Sandhya UC
Edited by Aswati Anand