Can You Help Us With Photographs Of This Trek?
We are looking to enrich this documentation with more photos. Pictures go a long way in explaining the trail, more than words ever can. If you have done this trek, can you share your photos with us? We will include them on this page, with due credit to you. Click here to contribute.
The Guide to Tapovan Nandanvan Trek
The Tapovan Nandanvan Trek coincides with a pilgrim route to one of the Char Dham. Gangotri is considered to be the mythological source of the river Ganga. It is said that King Bhagirath prayed to Lord Shiva for the salvation of the souls of his 60,000 sons. Shiva obliged and requested Goddess Ganga to release her water, which purified the ashes of Bhagirathi’s sons. Thanks to this mythological story, River Ganga is considered a means to purify one’s soul.
The temple at Gangotri was built by Amar Singh Thapa, a Gurkha General. The trek from Gangotri till Gaumukh has become part of the pilgrim route, as many choose to visit the holy meadows of Tapovan. The legendary duo, Eric Shipton and Bill Tilman, in their reconnaissance years in India, traversed the complete length of Gangotri Glacier and discovered trekking routes linking Badrinath to Gangotri and Kedarnath. They made it possible to traverse high altitude passes like Kalindikhal (5,960 m), and Satopanth Col. (5,419 m) and also found a logical exit route from the Chaukhamba basin.
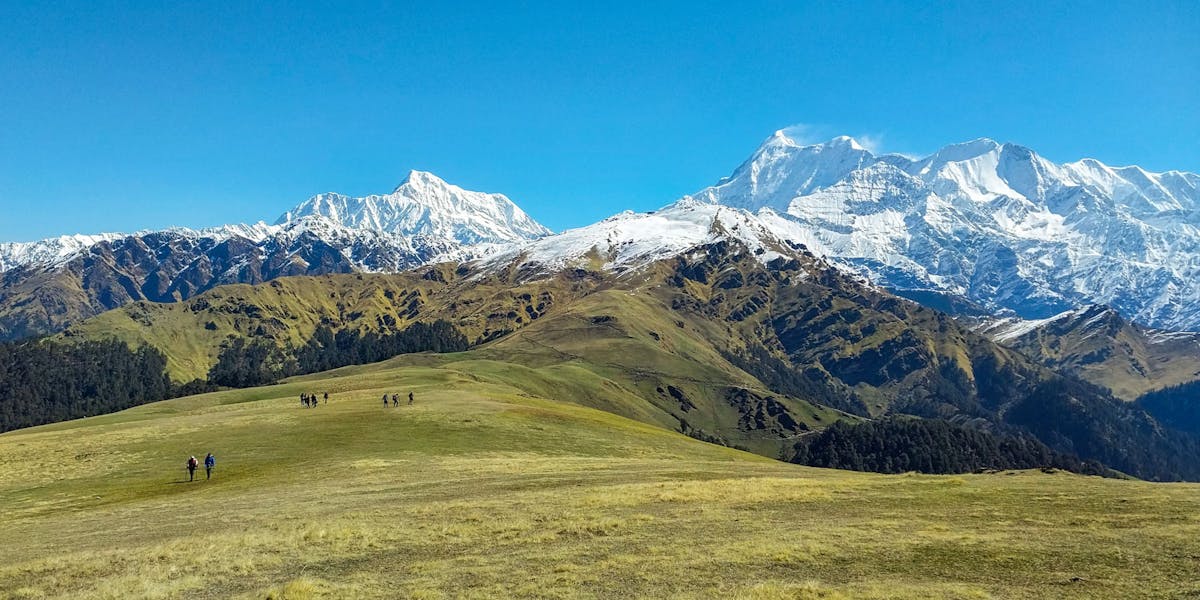
Five grand days with the majestic Mt. Shivling
- This trek to Tapovan and Nandanvan scores high in grandeur as it is nestled in between stunning snow-covered peaks, glaciers and lakes.
- Throughout the trail, trekkers are accompanied by views of awe-inspiring peaks like Shivling, Bhagirathi, Meru and The.
- This trek also gives one the honour of witnessing the origin of the mighty River Ganga.
➤ Trail Information
Day 0: Acclimatisation at Gangotri and preparation for permits
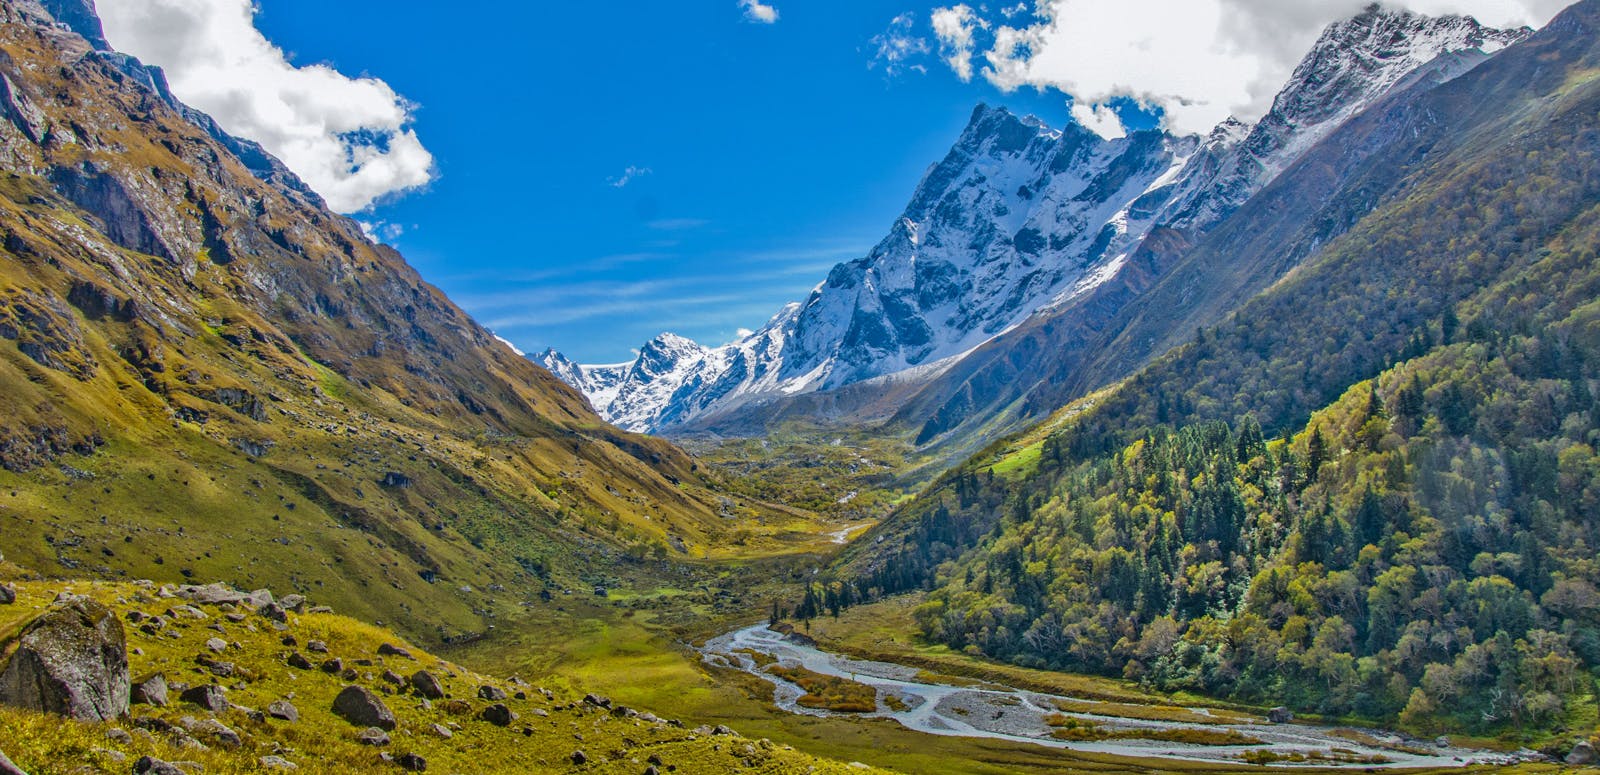
From Haridwar to Gangotri is a long and tiring road journey. Before starting the Tapovan Nandanvan Trek, rest for a day at Gangotri. It is a beautiful place, from where you can leisurely visit Chirbasa on the way to Gaumukh or spend some time at the Bhagirathi River. After the hustle and bustle of city life, Gangotri seems peaceful even amidst hundreds of pilgrims.
Meanwhile, also approach the Forest Officer in Gangotri for permits either a day before your trek or early morning on the day of your trek. The Forest Office is about 2 km ahead of Gangotri, towards the Gaumukh trail. The Divisional Forest Office located in Uttarkashi has laid certain rules for regulating the flow of pilgrims in the Gangotri National Park. The rules are:
- Only 150 pilgrims (including porters) are allowed to enter Gangotri National Park each day.
- Permits are now issued at Gangotri Forest Office. Earlier one had to obtain the permits from Uttarkashi itself.
- The entry fee per person is Rs.150 for two days and Rs. 50 per day for additional days spent.
- Forest Department reserves the right to refrain pilgrims/travellers from entering the Valley despite having obtained permits in advance.
- Camping at Gaumukh has temporarily been banned.
- Pilgrims are allowed only to 500-metre distance from Gaumukh.
- Carrying and disposing of non-biodegradable items like plastics are banned in the valley
- Mules ply from Gangotri until Bhojwasa
- A form obtained from Forest Department is to be filled, with copies of proof of ID to be attached.
Day 1: Gangotri to Chirbasa
- Altitude: 3,065 m to 3,585 m
- Time took: 4 hours, 8 km
- Gangotri: N 30°59.680, E 078 °56.369
- Chirbasa: N 30°58.757, E 079 °01.430
Trek Difficulty: It’s an easy day trek on well-laid trails, cemented in certain sections with few sheds to rest at on the way. There are gradual inclines and level walks. It is perfect for an orientation hike.
The trail to Chirbasa goes through a Forest Check Post around 2 km from the Gangotri bus stand. A trail goes up from the bus stand towards the left side of the forest. The trail runs on the left side of the market area and one can take multiple trails from inside of the market to connect with the trail. Walk till you reach the Forest Check Post.
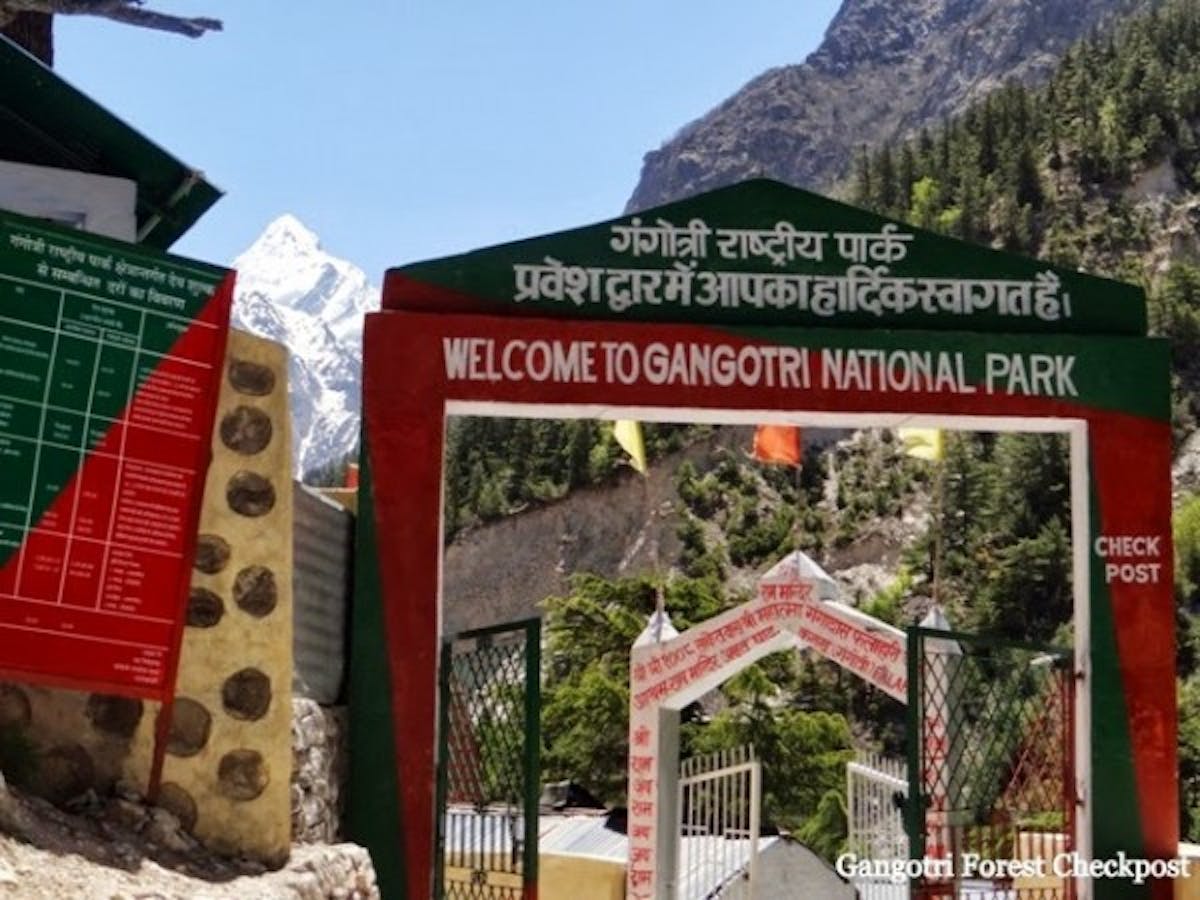
Image from Indiahikes Archive
This may take around 15-30 minutes, depending on where you start from, within Gangotri. From here, spot a striking white peak in the distance. This is Sudarshan Parbat (6,506 m) looking stunning in the background. It lies in a cluster of many major peaks. After getting the permits checked, proceed on the trail that remains on the left side of the mountain ridge throughout the day. The Bhagirathi River remains below, on your right throughout. There are a few isolated glaciers on the river that are melting rapidly.
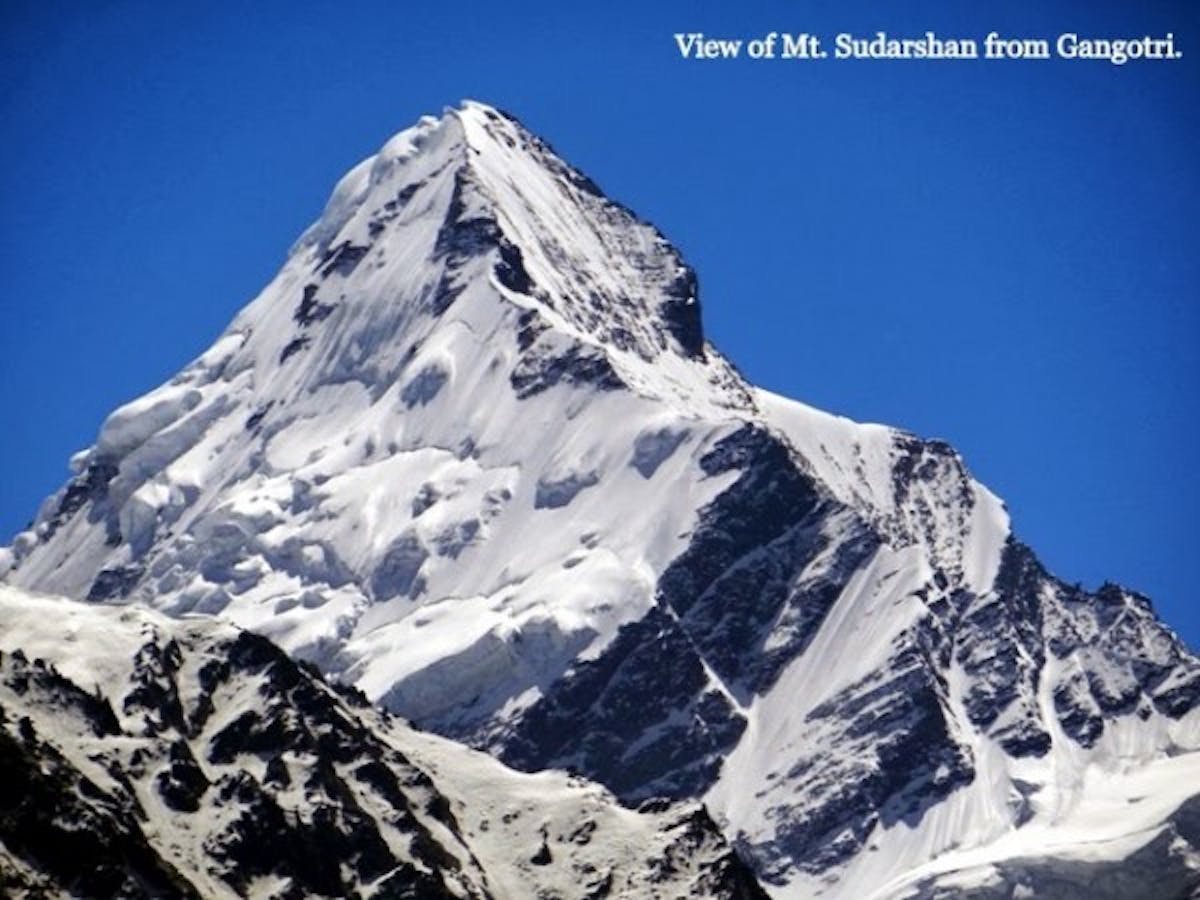
Image from Indiahikes Archive
In around 15 minutes, you will come across the first of many waterfalls and streams that you will see today. The trail mostly has gradual inclines and level walks. Trek for another 20-30 minutes and you will see another stream gushing below a makeshift bridge. After crossing the bridge, the valley opens up and turns right, giving you a previously unseen view. Feast your eyes on the several mountain ranges covered in snow on the right side of the valley. After 20 minutes, you will see the third major stream on your path. Sudarshan Parbat is now no longer visible. The trail remains consistent for another 45 minutes. Now, the path swirls further towards your right as you cross the third ridge, giving way to a breathtaking view of the valley. Bask in a healthy presence of Blue Pine and Silver Birch trees around you.
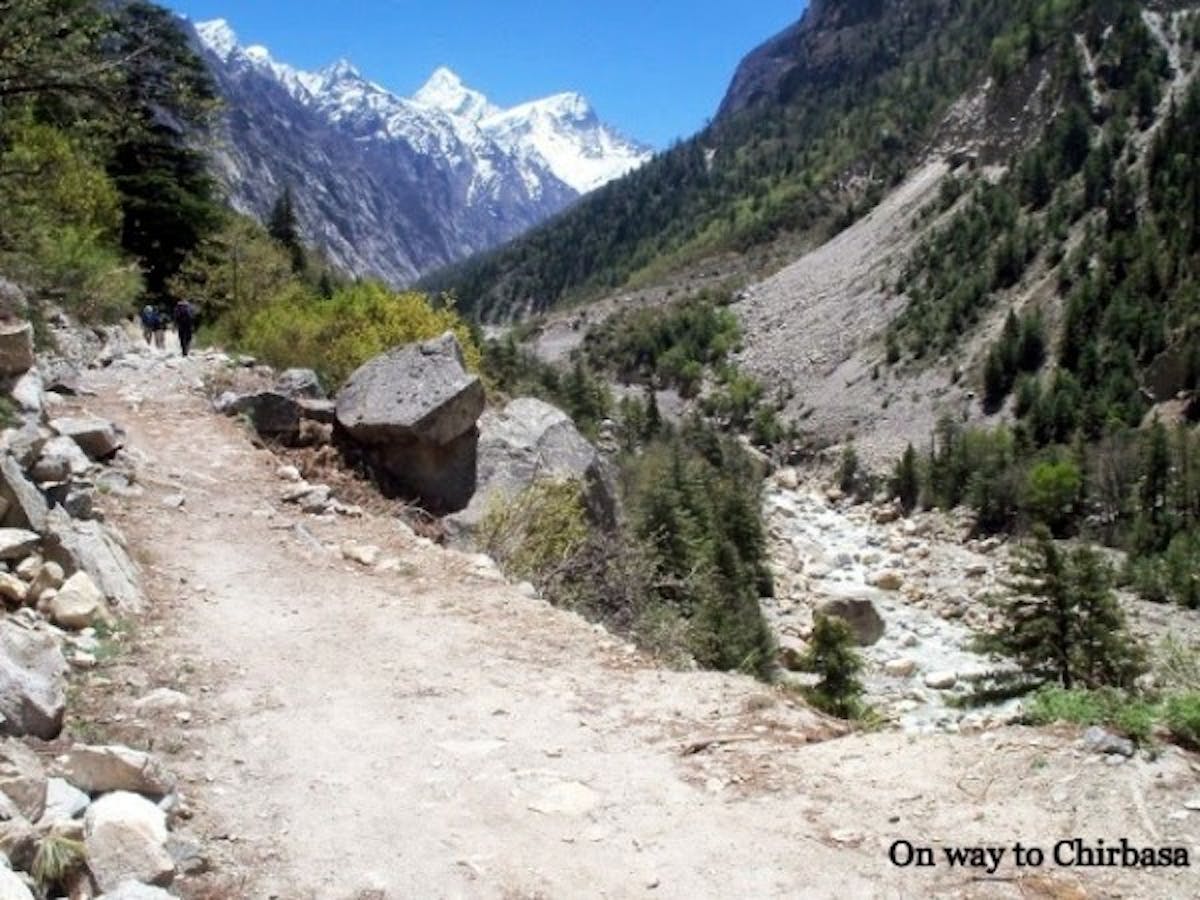
Image from Indiahikes Archive
A consistent hike of 45 minutes will bring you to a boulder crossing zone over one of the snouts coming from Sudarshan Parbat. Cross the moraine and hike up for about 10 minutes to reach a series of dhabas.
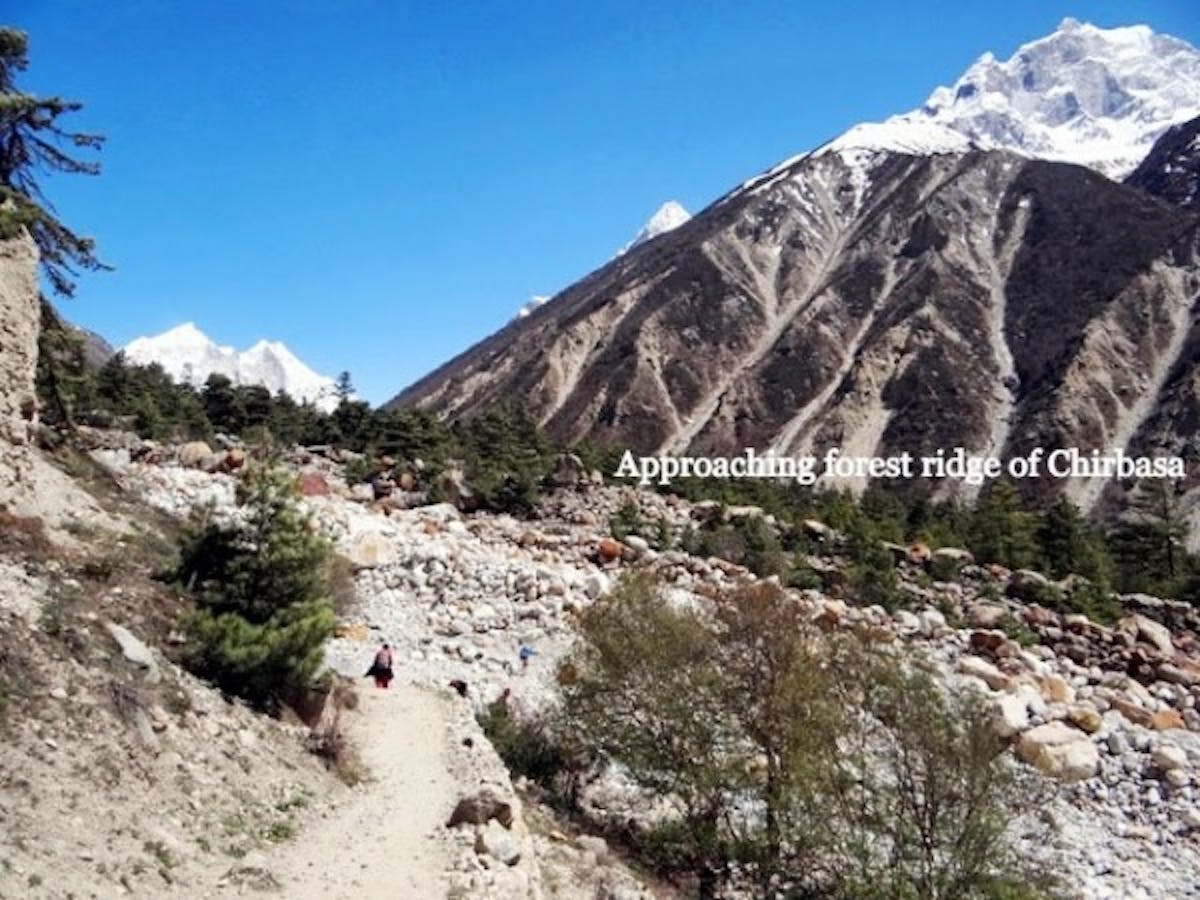
Image from Indiahikes Archive
Chirbasa is another 15 minutes away under forest cover. Special mention should be given to Himalayan Environmental Trust, who, along with the Forest Department, has been able to successfully implement an afforestation project in this area. As you pass the check post of the Forest Department, take the trail down on your right to reach the camping ground of Chirbasa. Look for a GMVN hut on level ground next to the Bhagirathi River. Camp here for the night. The main reason why one should camp at Chirabasa is that it helps in acclimatising in a better way.
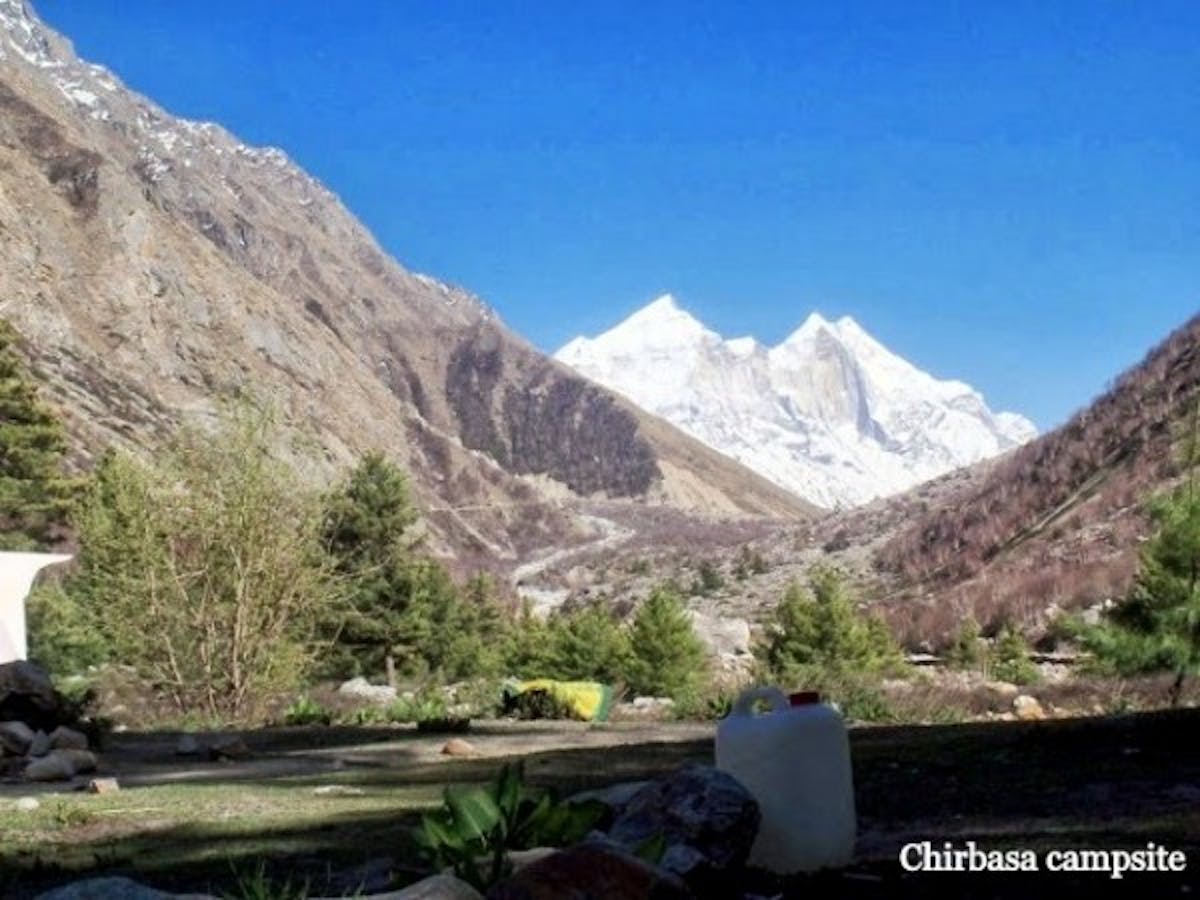
Image from Indiahikes Archive
Day 2: Chirbasa to Bhojbasa
- Altitude: 3,585 m to 3,795 m
- Time took: 5 km, 2-3 hours
- Chirabasa: N 30°58.757, E 079 °01.430
- Bhojbasa: N 30°57.031, E 079°03.062
Trek Difficulty: Today’s trek is easy over level trails and gradual inclines through boulder terrain. There is a series of 9-12 landslide zones. The terrain gets tricky during monsoon season as it is prone to active landslides. It is advisable to start the trek early in the day to avoid landslides.

Image from Indiahikes Archive
Take the trail from the backside of GMVN hut. The trail connects with the Gomukh trail, which extends from forest check post. This section will take 5 to 10 minutes. Once connected with the primary trail, you will be able to see the Chirabasa campsite below. There is a minor landslide-prone section within 10 minutes from this point. After this section, the terrain is broken in certain sections but is manageable. Look for the first ridge ahead towards your left in the distance. It takes around 30-45 minutes to reach this ridge and cross the bend.
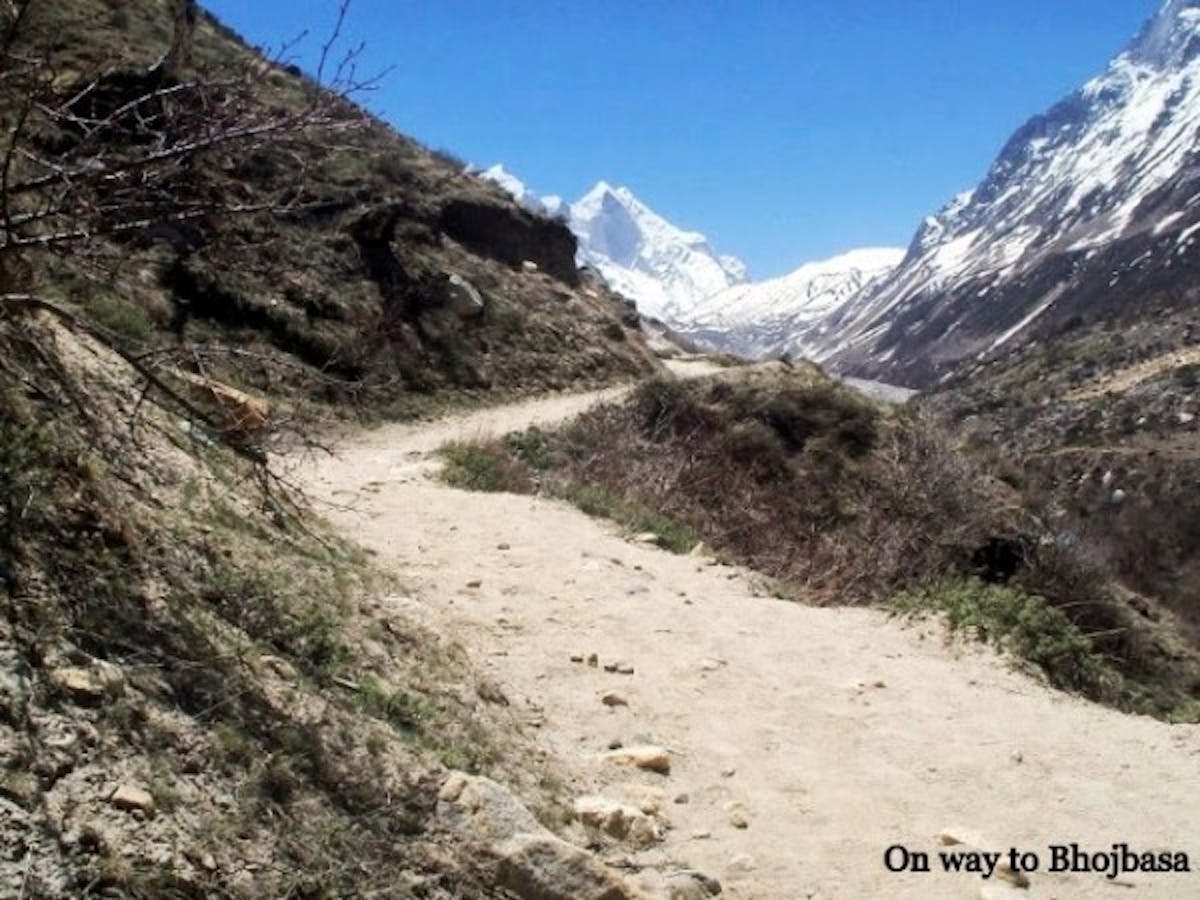
Image from Indiahikes Archive
As you trudge through the silent hills, the Bhagirathi peak looms closer into view. After 20 minutes of gradual ascent, look for a stream on your left. Another 45 minutes of a similar gradient will have you reach another landslide-prone area. This area has a boulder gradient and a stream crossing your path. Climb up for another five minutes to traverse the second ridge/bend. There are 8-9 landslide-prone bends from here. It takes 20- to 30 minutes to traverse this section. Keep an eye for falling rocks and avoid resting. Move swiftly. After crossing this section, you will see a bridge with a stream flowing below. Bhojbasa is only 1.5 km from this point. The trek to Bhojbasa is a level walk and very scenic. You reach a vantage point from where you get clear views of Gaumukh. Since camping at Gaumukh has been prohibited, Bhojbasa provides good camping spots. It sits next to the Bhagirathi River and has scarce vegetation. There are a few forest huts and also a GMVN here. One can also seek accommodation at Nirmal Baba Ashram. There is a small observation facility for the Weather bureau at Bhojbasa. The camping ground gets very cold after sunset and is very windy – leading to a temperature dip. The temperature hits sub-zero at night.
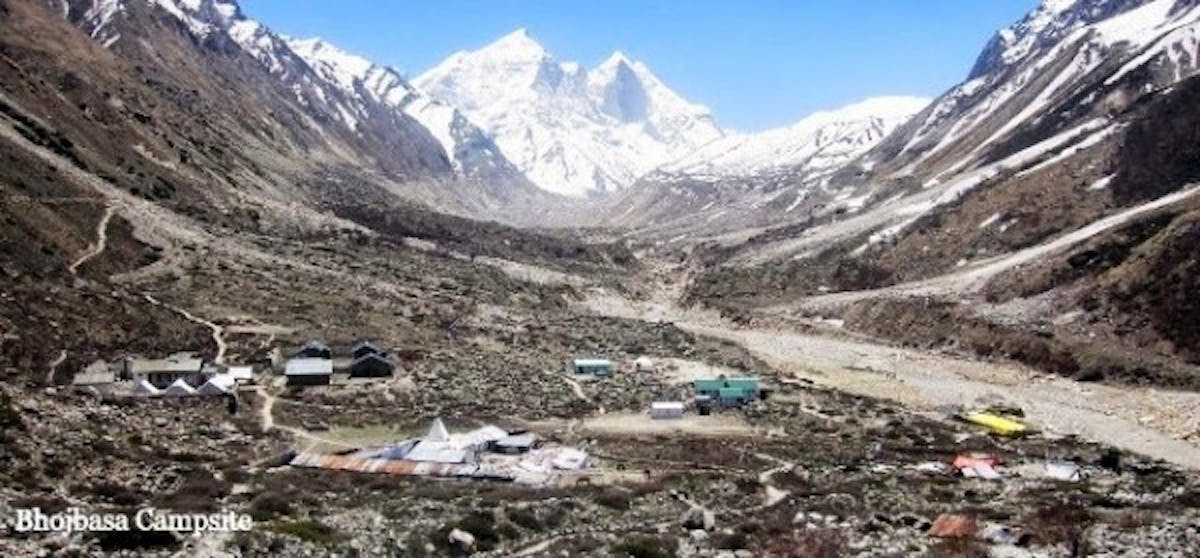
Image from Indiahikes Archive
Day 3: Bhojbasa to Tapovan via Gaumukh
- Altitude: 3,795 m to 4,329 m
- Time took: 10 km, 5-6 hours
- Bhojbasa Campsite: N 30°57.031, E 079°03.062
- Gaumukh: N 30°55.823, E 079 °04.544
- Tapovan Campsite: N 30°55.094, E 079 °04.553
Trek Difficulty: Moderate to Difficult. The trek to Gaumukh is a leisure walk. The trail from Gaumukh to Tapovan involves climbing glacial moraine and traversing the Gangotri glacier on the right. One needs to traverse steep landslide-prone areas and a glacial stream called Akash-Ganga. One needs the company of an experienced guide is required from Gaumukh to Tapovan. Take the trail from the GMVN hut going up and connecting with the Gaumukh route. It takes 10 minutes till you intercept the primary trail to Gaumukh. Gaumukh is 5 km from Bhojbasa and takes around two hours to reach Gaumukh. The trail remains level with few gradual inclines. After 20 minutes of level walk, you reach the first glacial stream crossing. You can now see Mt. Shivling on the right.
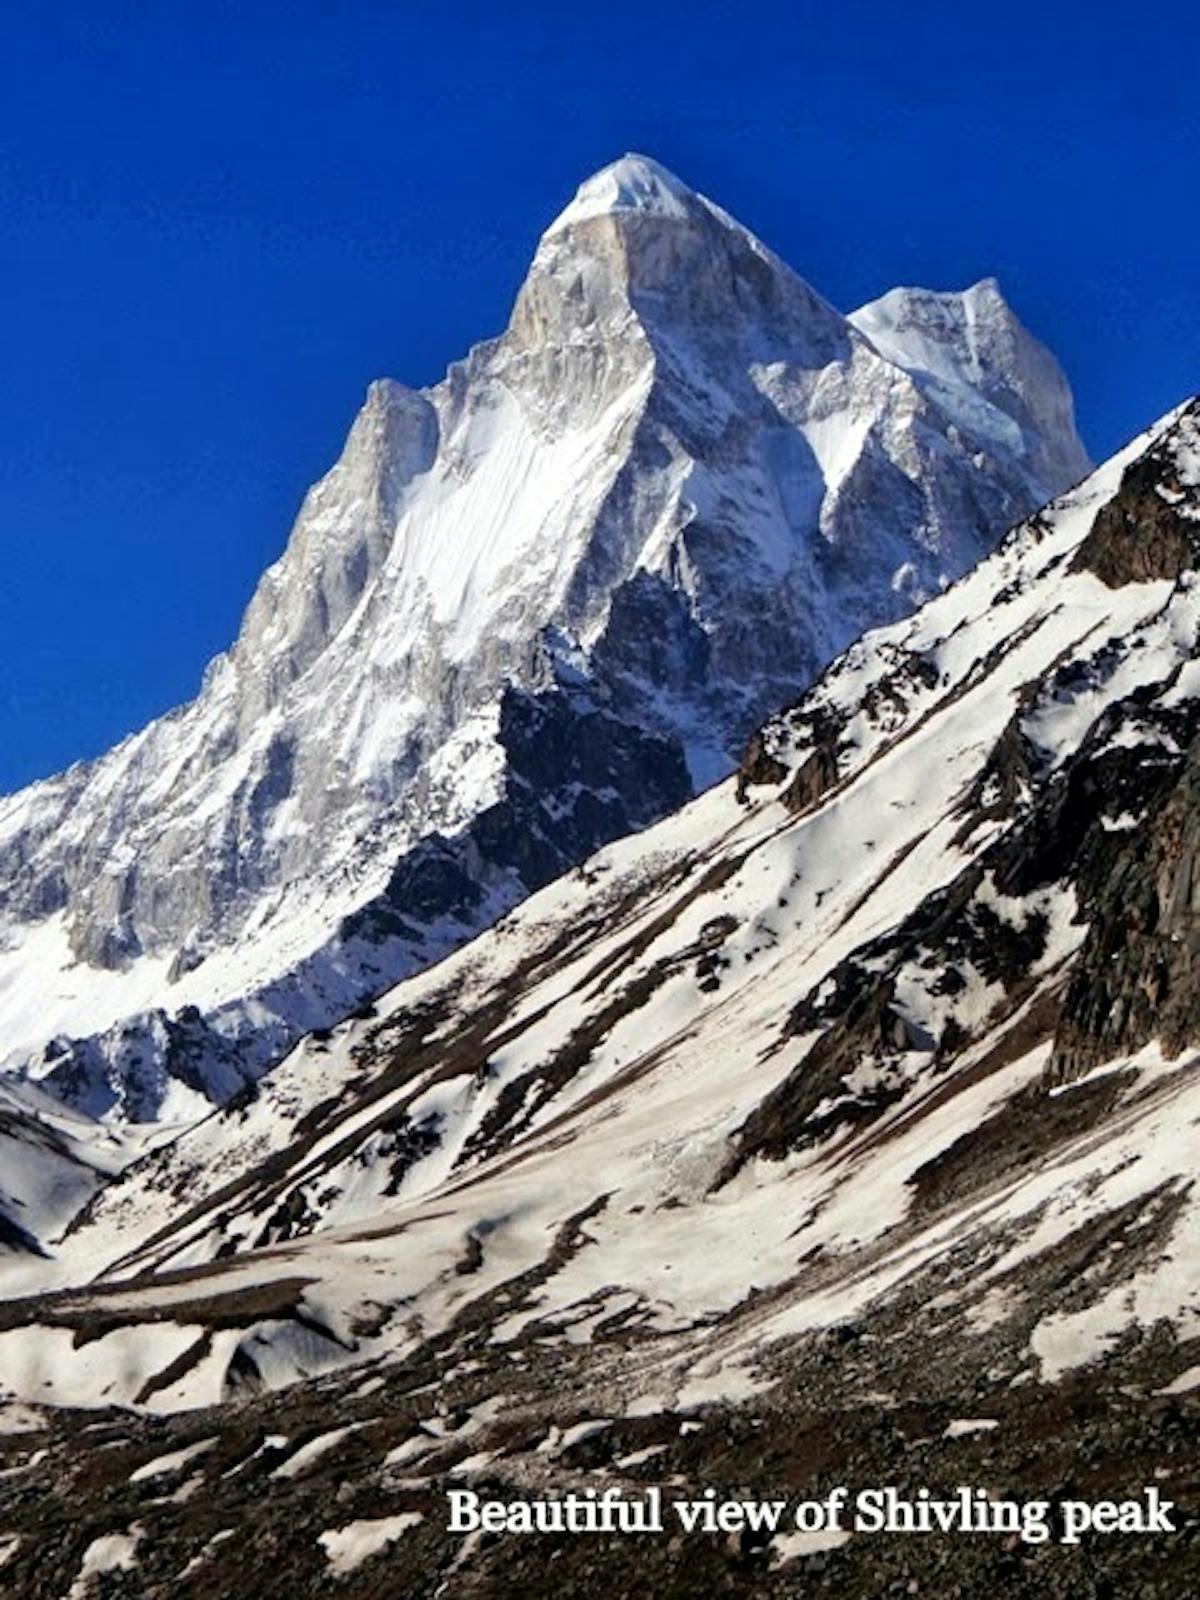
Image from Indiahikes Archive
After 20 minutes, you reach a rock face that you need to cross over. As you cross this bend, you get an unprecedented view of Gaumukh. The trail now becomes boulder moraine but is manageable.
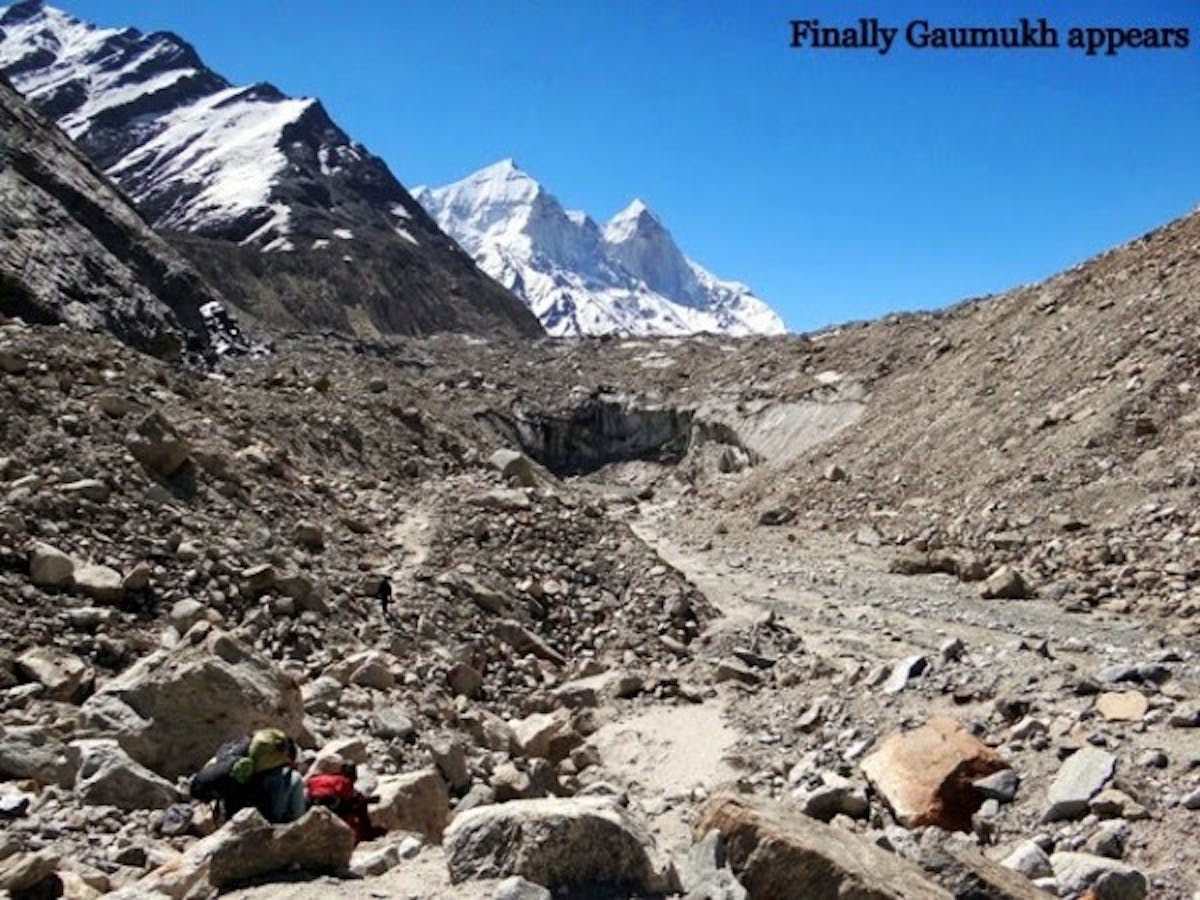
Image from Indiahikes Archive
Another 15 minutes later, you reach the second major stream crossing. Then, 20 minutes of level walk on the defined trail will get you to a level camping ground. Climb up the moraine and walk to the vantage point of Gaumukh, which is 500 metres away from the glacier. There is a small open temple of Lord Shiva here. Pilgrims are refrained from going any further unless they have permission to camp at Tapovan. Proceed from the left side of the moraine ridge and climb up another 20 metres. You now get a great view of the Gaumukh glacier. As you proceed, observe the fragmentation of the glacier and debris from the rockfall over the years.
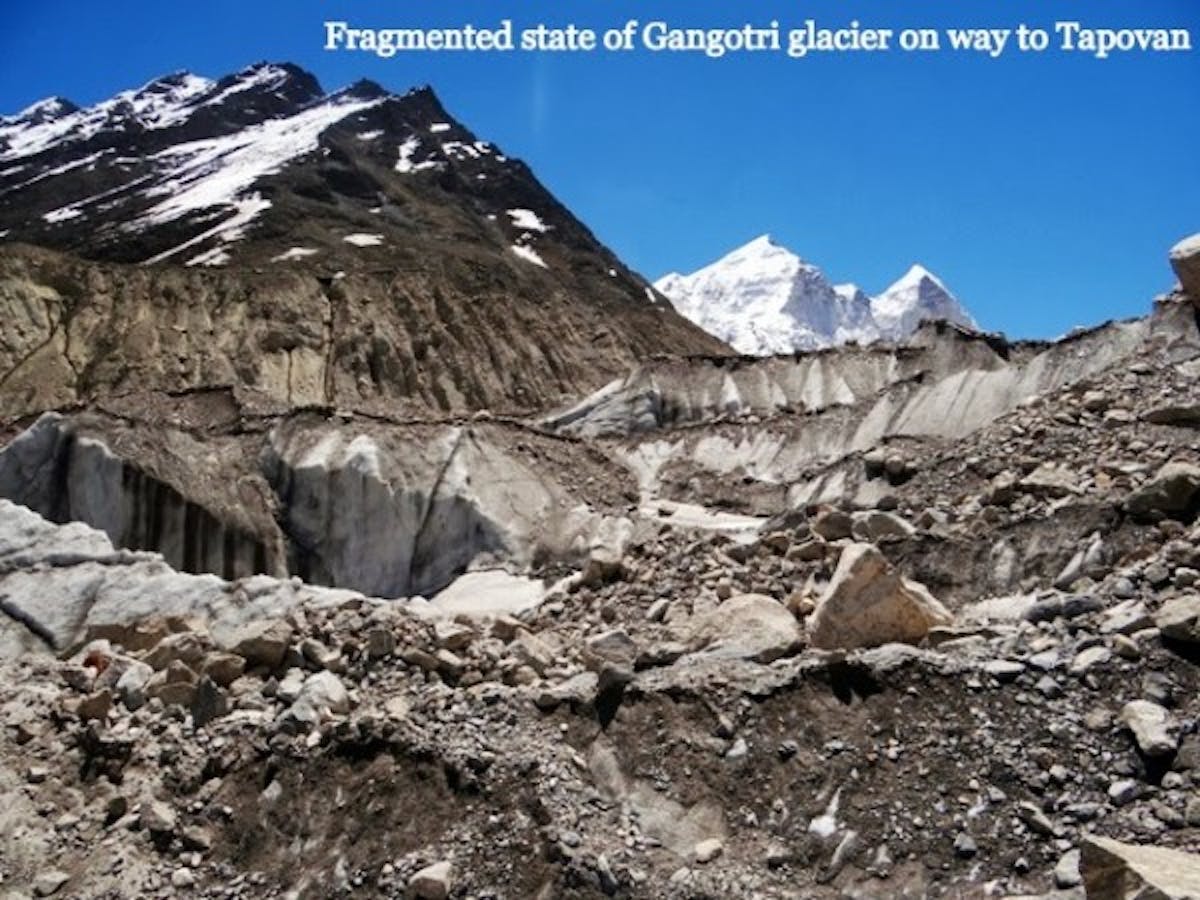
Image from Indiahikes Archive
The terminal moraine is a combination of hard ice and boulders and can get slippery in certain sections. Even with cairns marking the route, finding it can be tricky since the route goes over an active glacial basin and is always changing. The initial climb to the top of the Gaumukh glacier from the left side is a 100-metre ascent. A local guide is highly advisable here. The climb up the 100 metres can take an hour and a half. The route via the terminal moraine takes almost an hour to traverse and reach. After this, you hit a rock face, which you will have to climb to get to Tapovan.
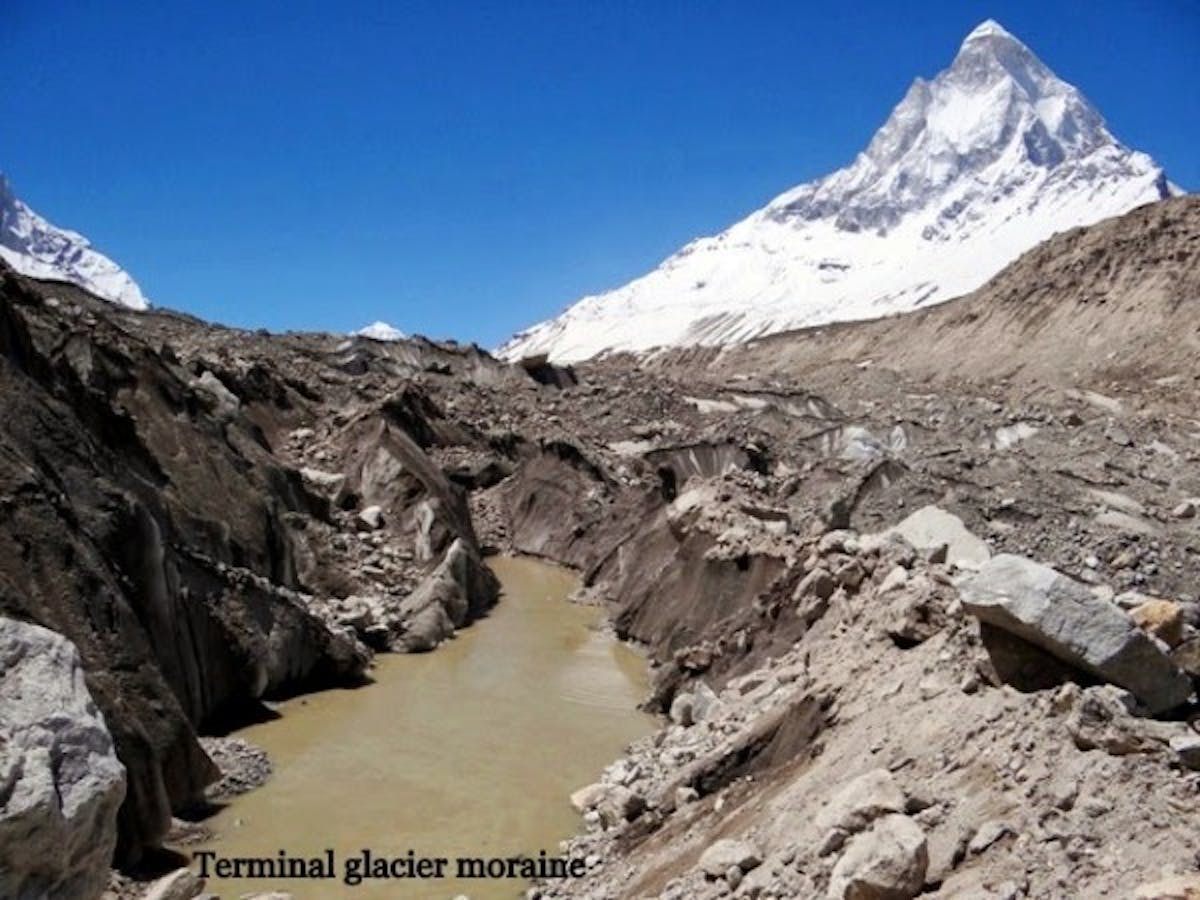
Image from Indiahikes Archive
This climb is adjacent to Akash Ganga, which flows vertically down this rock face. Ensure this section is climbed before lunchtime to avoid potential rockfalls and increase in the volume of water coming down Akash Ganga. The climb takes an hour to two, depending upon the conditions. The climb is a steep incline on loose gravel.
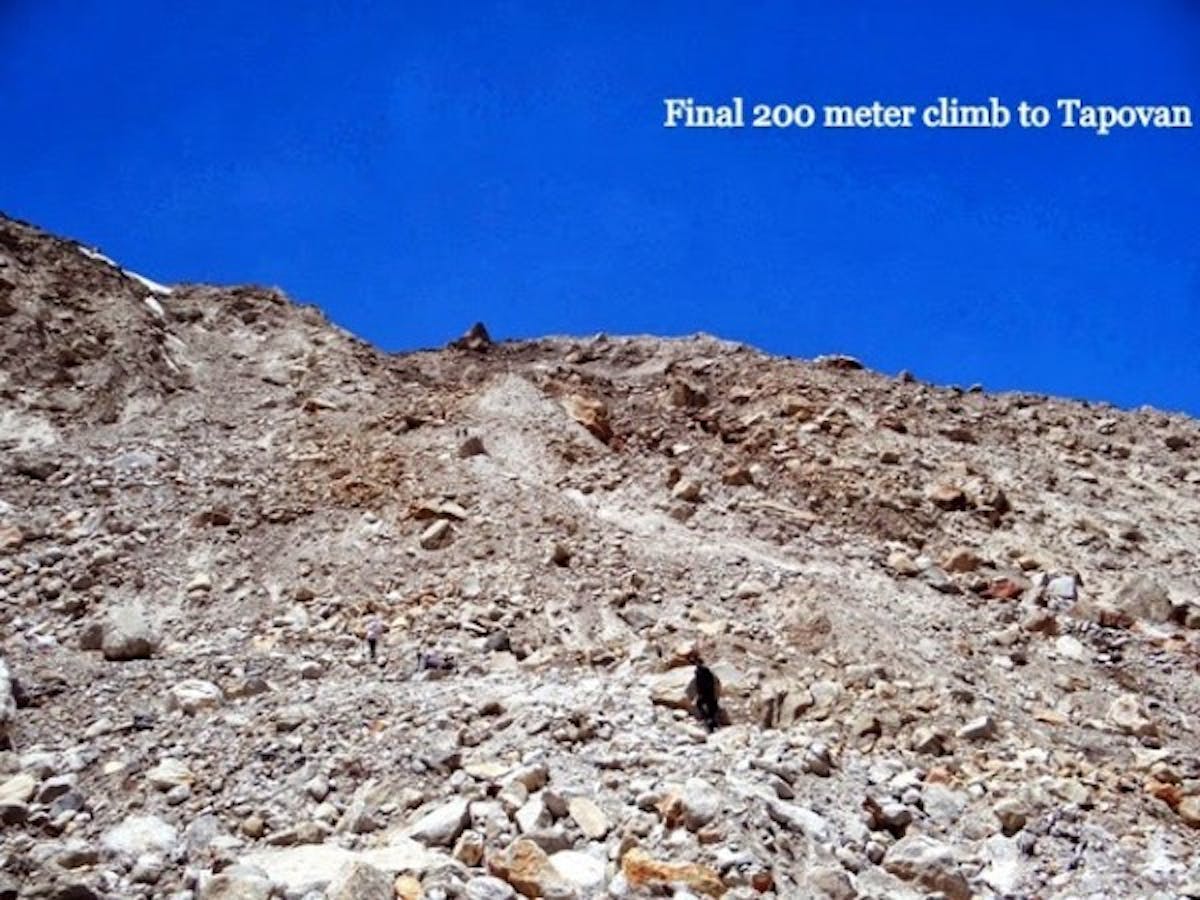
Image from Indiahikes Archive
After about 100 metres into the climb, look for spots from where you can cross Akash Ganga. If the volume of water is high, then you need to take your shoes off and cross the stream. Otherwise, boulder hopping is also possible. Once the stream is crossed, climb straight up. Remain on the right side of Akash Ganga. After 30-45 minutes, you will reach the vast level ground that has been your destination until now – Tapovan. Look for a suitable camping spot and camp for the night.
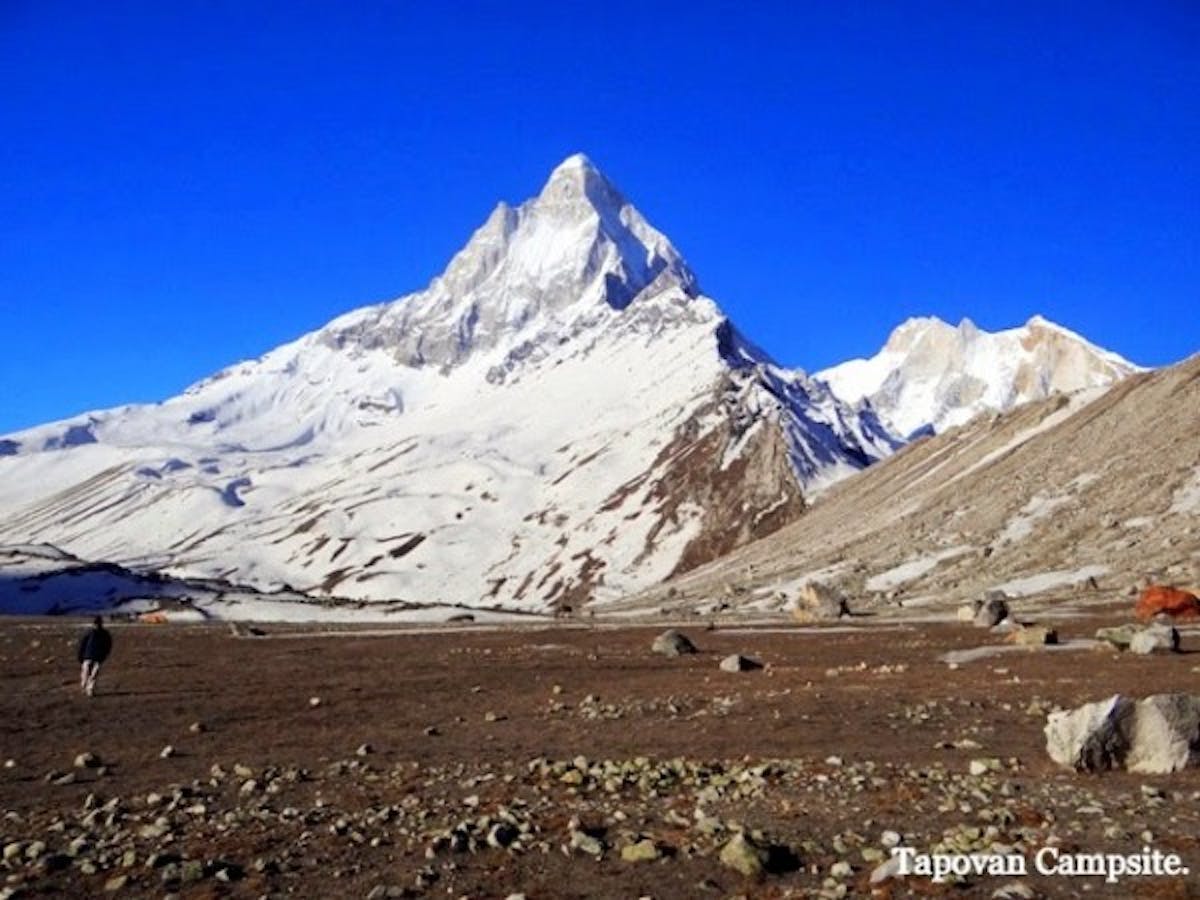
Image from Indiahikes Archive
Tapovan is a high-altitude alpine meadow below Mt. Shivling, which dominates the landscape. Tapovan is spread over 2 km in length. Although it’s vast level ground, not all the land is suitable for camping, as the area close to Mt. Shivling is wet during early summer due to melting snow and glacial water. These grounds have been used by many sages to meditate over the centuries. Many such holy men are living permanently at Tapovan.
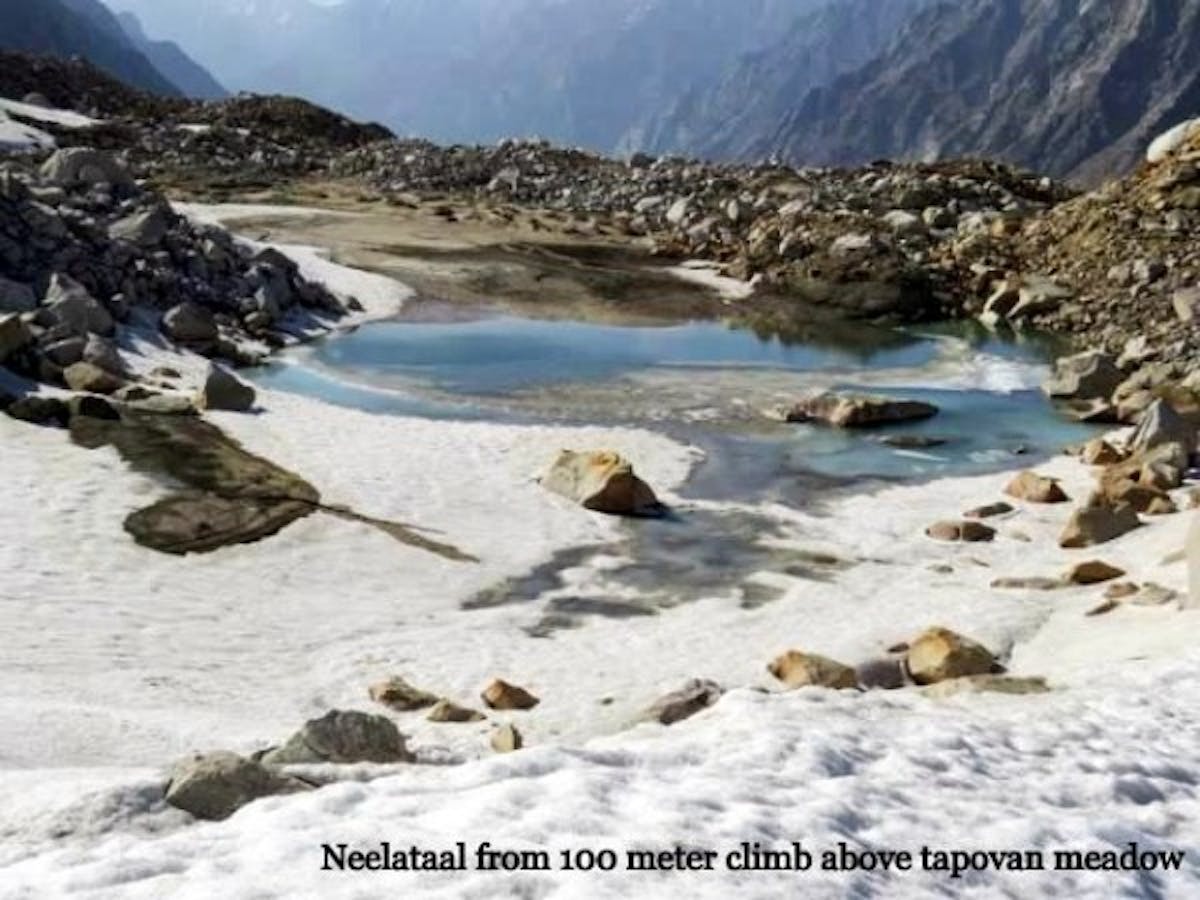
Image from Indiahikes Archive
A short hike from Tapovan to Neelataal is a good option and can be done in an hour. From the left side ridge of Tapovan, climb up a 100-metre rock face and traverse to the other side. As you reach the top of this ridge, you will be able to see a small glacial lake. This is Neelataal. From here, one gets great views of Gangotri glacier, Tapovan campsite, Meru Parvat, Shivling and the Nandanvan side.
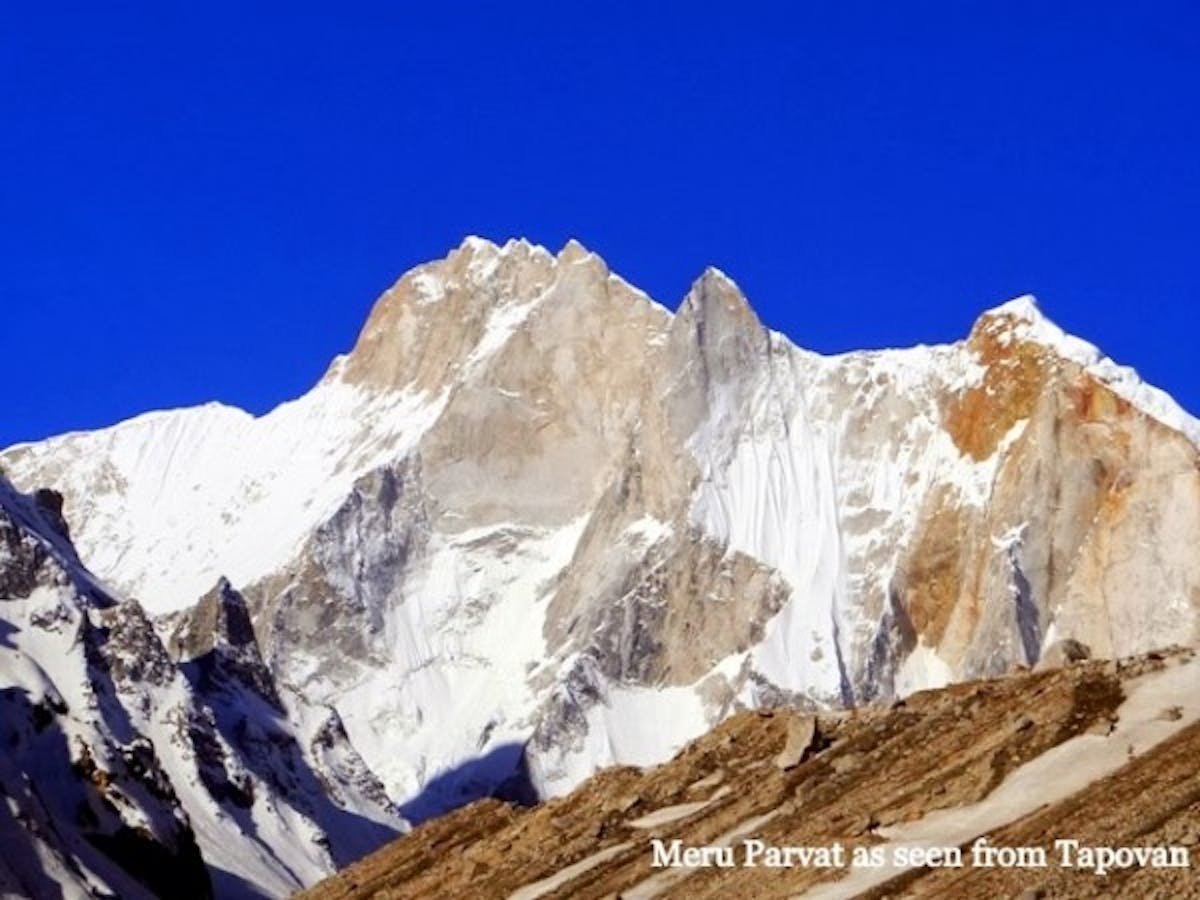
Image from Indiahikes Archive
Day 4: Tapovan to Nandanvan and back to Bhojbasa
- Altitude: 4,329 m to 4,367 m, back to 3,795 m
- Time took: 7-9 hours, 15-17 km
- Tapovan Campsite – N 30°55.094, E 079 °04.553
- Nandanvan Base (Below Nandanvan) – N 30°54.335, E 079°05.886
- Nandanvan – N 30°54’2″ E 079°06’20”
Trek Difficulty: Difficult. This is a long trek over terminal glacial moraine and steep ascents and descents. Most of the terrain is with loose rocks that are prone to fall. Apart from the difficult terrain, finding the route on the Gangotri glacier can be tricky and may take longer, depending on the weather. An experienced guide is a must.
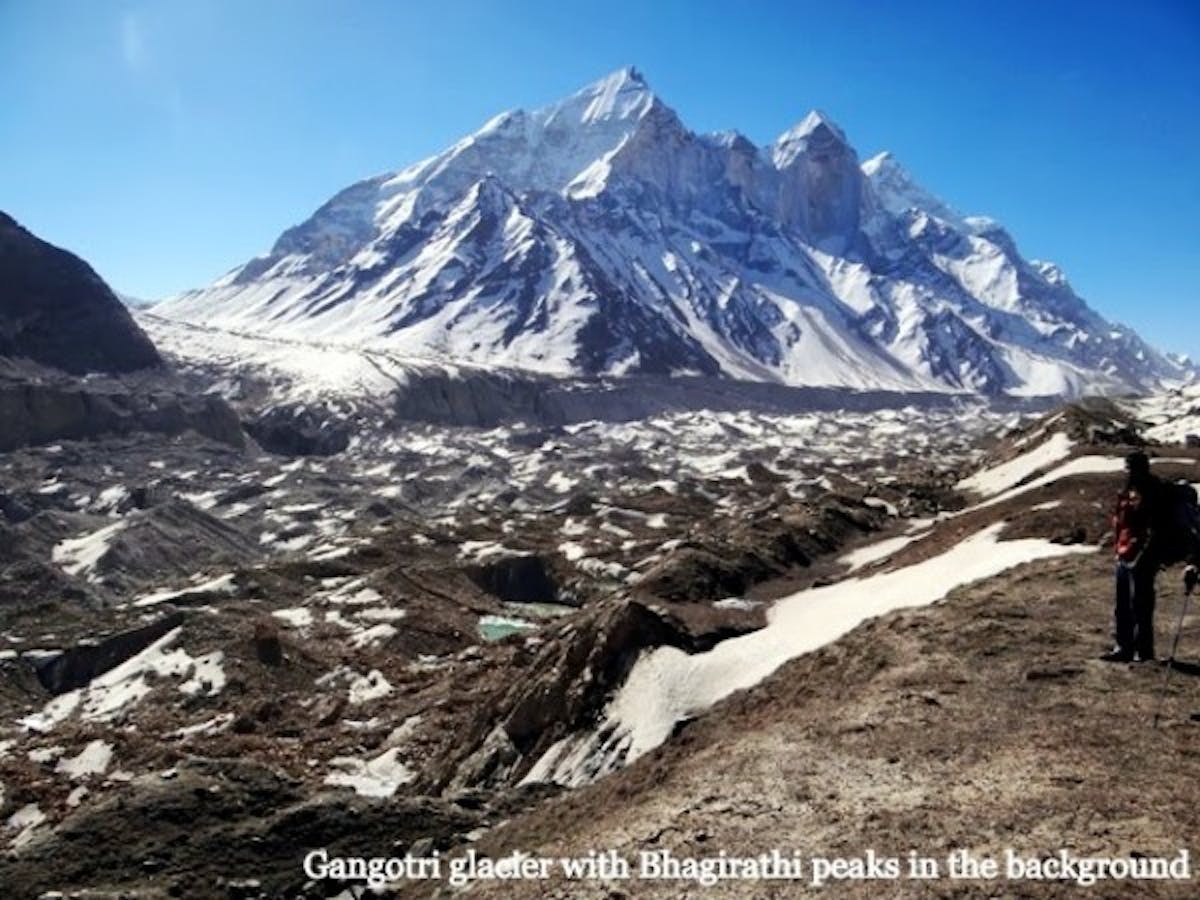
Image from Indiahikes Archive
Start very early in the day as a lot of distance needs to be covered. Proceed straight along the west side ridge of Tapovan. After five minutes, cross the Akash Ganga stream and proceed straight up a small ridge. Spot Mauni Baba’s hut along a cave. Walk ahead and pass a shivlingam. From this spot, you can see the Gangotri glacier on your right. Trek another 1.5 km along the ridge to find a suitable route to descend down to the Gangotri glacier. This section is a level walk and offers fantastic views of the Bhagirathi peaks. Look for a level ground below Bhagirathi. This is Nandanvan meadow. Towards the right of Nandanvan is the Chatrunagi glacier. Identify a spot from where you can descend a 90-metre ridge down to the base of the Gangotri glacier. This may take anything from 15-30 minutes. Once at the base, explore a way to traverse the glacier to the other side. The width of the glacier below Nandanvan is around 2.5 km. However, you may end up trekking more as you try to find the most feasible route over the terminal glacial moraine.
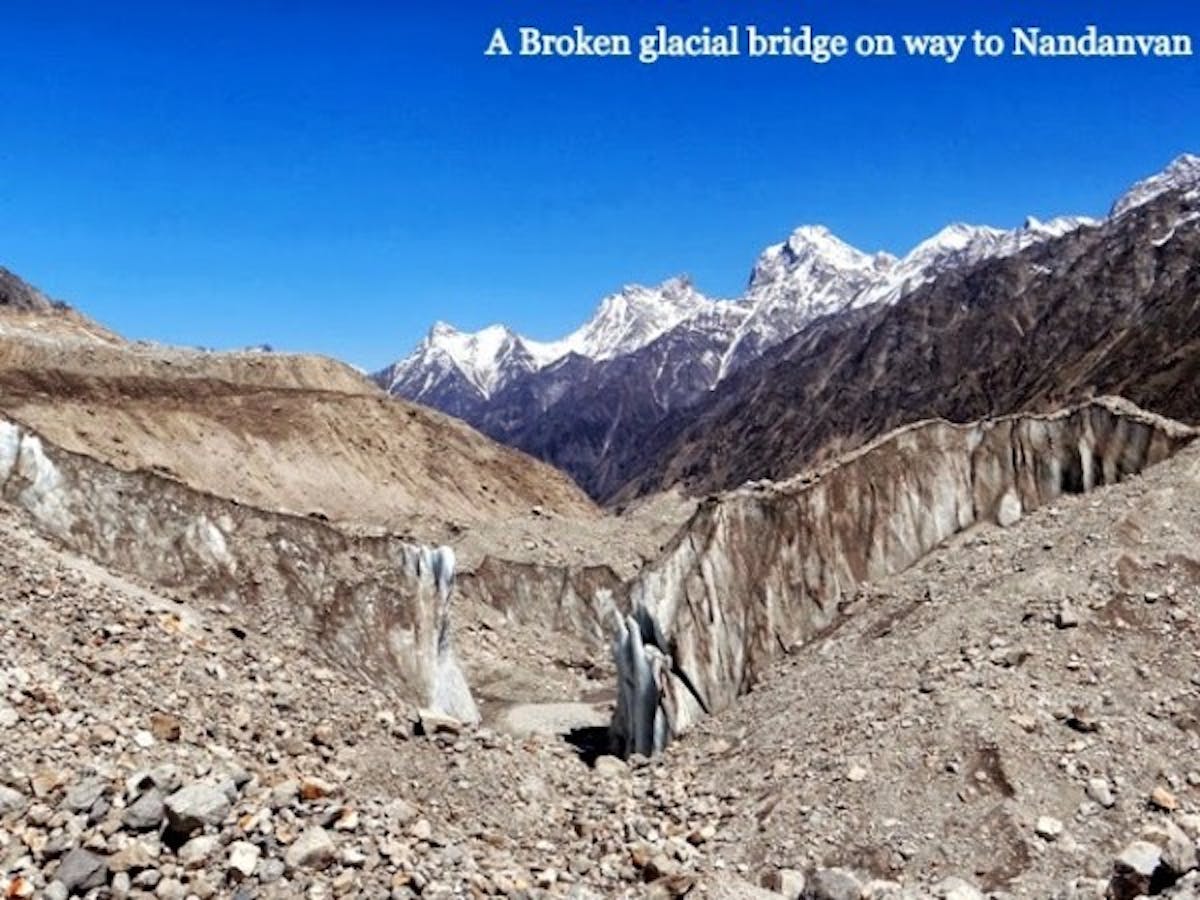
Image from Indiahikes Archive
Many sections of the glacier comprise fragmented ice, boulders and debris. They could be unstable. Avoid walking on thin ice slabs as they may collapse. There is no fixed route due to the changing nature of the glacier. The glacier traversed May for 2 hours. Once you have crossed over, look for the rock face towards the right of the terminus, where the Chatrungi glacier and Gangotri glacier meet. Observe that the meeting point towards Chatrungi’s side has collapsed and is not suitable to traverse on the way back to Gaumukh from Nandanvan. From the base below Nandanvan, it is a 100-metre climb up a landslide-prone slope.
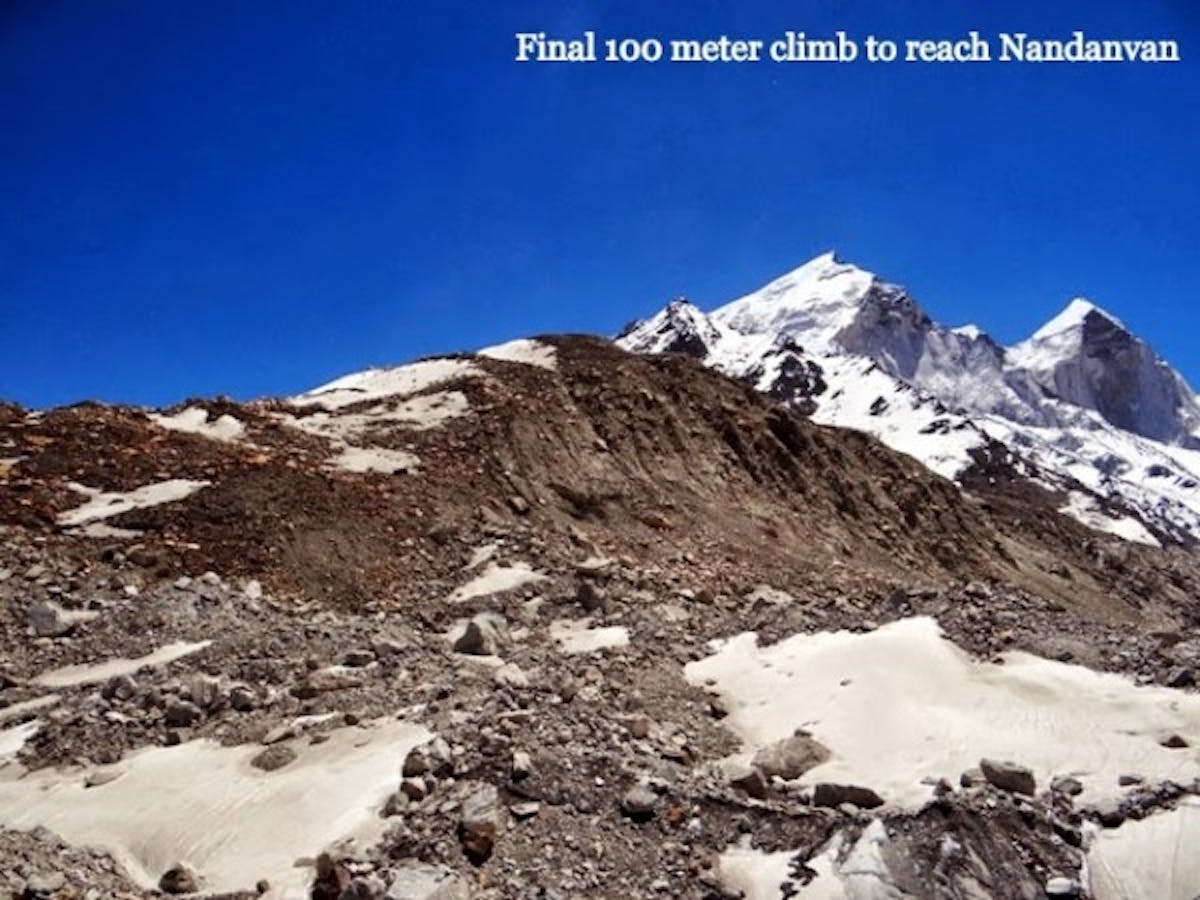
Image from Indiahikes Archive
The climb can take an hour and can be tiring. The Nandanvan camping ground is located at the base of Mt. Bhagirathi-2 and offers great views of Mt. Kedardome, Mt. Shivling, Mt. Meru and Kirti Bamak Glacier. Leave Nandanvan by descending the same route taken from the base. Due to the complete collapse of the meeting point of the Chatrungi and Gangotri glacier, proceed towards your left and enter the Gangotri glacier route to find a way back to Gaumukh.
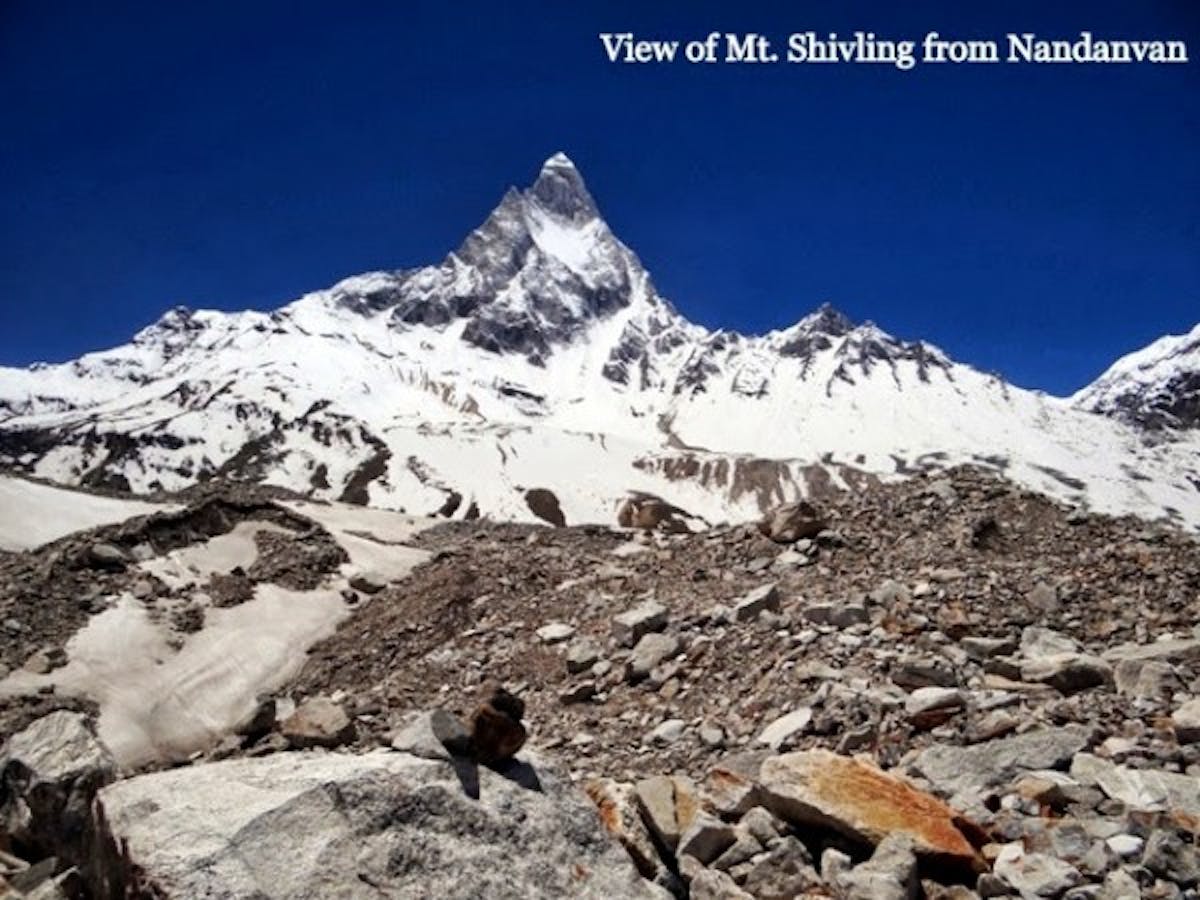
Image from Indiahikes Archive
This will involve going towards the middle of Gangotri Glacier and then finding a way through, as per the conditions of the glacier. This stretch back to Gaumukh is 3-4 km and may take 3-5 hours to traverse depending upon the prevalent conditions. Once at Gaumukh, the route back to Bhojbasa is the same and will only take an hour more. Note – It is advisable to camp at Nandanvan and not trek from Tapovan to Bhojbasa going via Nandanvan in a single day.
Day 5: Bhojbasa to Gangotri
- Altitude: 3,795 m to 3,065 m
- Time took: 4-5 hours, 13 km
➤ How to get fit for Tapovan Nandanvan Trek

Cardiovascular endurance
This trek requires a good amount of endurance. You can begin by jogging everyday. Start jogging at a slow pace and then keep increasing your pace day by day. Make sure you are able to jog 4 km in 20 minutes before the start of the trek. It takes time to be able to cover this distance in the given time. Swimming, cycling and stair climbing without too many breaks in between can help too.
Strength
This is another area you should work on. There is a lot of trekking distance that you will cover carrying your backpacks and trekking along with your backpack is not a very easy task. You have to walk on uneven terrain during the trek. It could be taxing for your legs. For this, strengthening your legs will help. You can do some squats to strengthen them. Do around 3 sets of squats, with 8 squats in each set.
Flexibility
Another aspect that will help you trek comfortably is flexibility. For this, you can do some stretching exercises – stretch your hamstrings, quadriceps, hip flexors, lower back muscles and shoulders regularly. On your trek, it is important that you arrive on the slopes with your muscles relaxed. Carrying a backpack, however light, can become a strain after a while. These exercises will help you to be in good shape before the trek.
Working out indoors
If you can’t go out and jog because of time and space constraints, here’s a video you can use to work out indoors.
➤ What to take on the Tapovan Nandanvan Trek

Bare necessities
- Trekking shoes: The trek distance is long and you will have to walk for long distances which needs you to have comfortable trekking shoes. You can watch this video to learn to choose the right trekking shoes.
- Backpack (40-60 litres): A backpack with sturdy straps and a supporting frame. Rain cover for the backpack is essential.
The Miyar Valley Dun trek happens round the year except for monsoons so make sure you have the proper clothing as per the season demands so you can keep yourself protected during the trek.
Clothes
- Three (Five in Winter) Warm Layers: You will be trekking and camping at high altitudes. So make sure you have the apt clothes for the climatic conditions. It will be cold at the higher altitudes so make sure you have at least three layers of warm clothes to protect yourself.
- Two trek pants: One pair of pants should suffice for this trek. But you can carry one spare pair in case the first one gets wet. Wear one pair and carry one pair.
- Two collared t-shirts: Carry light, full sleeved t-shirts that prevent sunburns on the neck and arms. Again, wear one and carry one.
- Thermals (Optional): Those who are more susceptible to cold can carry thermals to wear at night.
Accessories
- Sunglasses: Sunglasses are to prevent snow blindness. There might be snow in Har Ki Dun Valley or from Kalkatiyadhaar (depending on the season you are going in), so carry a pair of sunglasses.
- Suncap: The sun is harsher at high altitudes so wear a sun cap to protect your face and neck.
- Synthetic hand gloves: One pair of fleece or woollen hand gloves. One pair of waterproof/resistant, windproof gloves.
- Balaclava: You may use woollen scarves instead as well.
- Socks (2 pairs): Apart from two sports socks, you can take a pair of woollen socks for the night.
- Headlamp/LED torch: Mandatory
- Trekking pole: Watch this video to understand why you need a trekking pole.
Others
- Daypack (20 litres): If you are offloading your backpack, you will need a smaller backpack to carry water, a medical kit and some light snacks.
- Toiletries (Sunscreen, moisturiser, light towel, lip balm, toilet paper, toothbrush, toothpaste)
- Cutlery: Carry a spoon, coffee mug and a lunch box. We insist on trekkers getting their cutlery for hygiene reasons.
- Two water bottles: 1 litre each
- Plastic covers: While packing, use plastic bags to compartmentalise things and carry a few extra plastic bags for wet clothes.
Mandatory Personal Medical Kit
- Diamox – 10 tablets (to prevent AMS)
- Crocin – 6 tablets (fever)
- Avomine – 4 tablets (motion sickness)
- Avil 25mg – 4 tablets (allergies)
- Combiflam – 4 tablets (Pain killer)
- Disprin – 6 tablets (headache)
- Norflox TZ & Lomofen– 6 tablets each (diarrhoea)
- Digene – 10 tablets (acidity)
- Omez/ Rantadine – 10 tablets (antacids)
- Crepe bandage – 3 to 5 meters
- Gauze – 1 small roll
- Band-aid – 10 strips
- Cotton – 1 small roll
- ORS – 10 packets
- Betadine or any antiseptic cream
- Moov spray (aches, & sprains)
Trek Difficulty: Easy, the trek involves a gradual descent and a series of level walks, which can be done swiftly. The trek back to Gangotri is the same trail taken to reach Bhojbasa. The downward trail is very much manageable and can be done easily.
Author: Vaibhav Chauhan